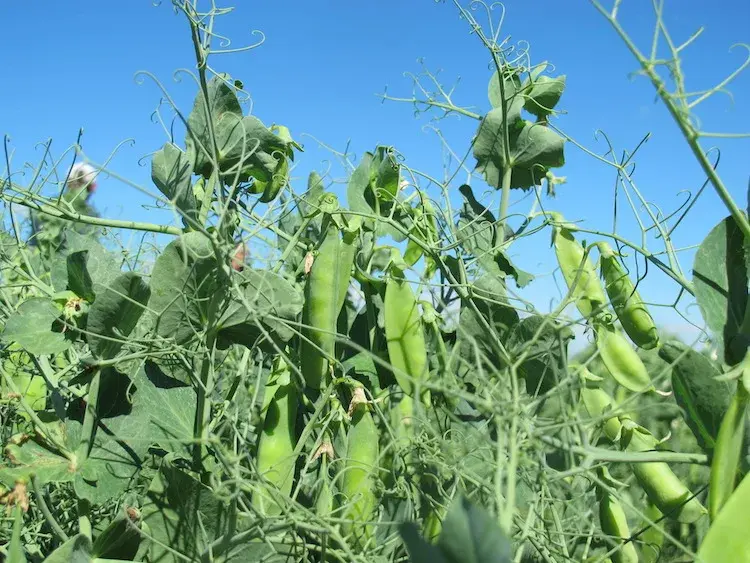
🌱 Can Chickens Eat Field Peas? Growing Field Peas for Chickens
Field peas are cool-season annual legumes that can produce protein-rich dry seed, tender green peas, seasonal foliage, nitrogen-fixing root systems, and useful crop residue. For backyard chicken keepers, they offer more protein than most homegrown cereal grains while improving garden diversity and soil health. Field peas are best used as one ingredient in a diversified feed garden rather than as a complete replacement for balanced poultry feed.
🫛 Can Chickens Eat Field Peas?
Yes. Chickens can eat properly handled field peas as a supplemental food. Clean mature dry peas, tender green peas, plain cooked peas, carefully prepared soaked peas, and sanitary sprouts may all be used in moderation alongside complete poultry feed.
Field peas are higher in protein than most cereal grains, but that does not make them a complete protein ration. They remain comparatively limited in sulfur-containing amino acids such as methionine and do not provide enough calcium, vitamins, minerals, or balanced energy to replace complete feed.
Practical feeding forms include:
- Clean mature dry peas: May be offered whole to suitable adult birds or cracked or coarsely ground for easier mixing and consumption.
- Plain cooked peas: Cook thoroughly, cool completely, and serve without salt, butter, oils, sauces, garlic, onions, spices, or other seasonings.
- Fresh green peas: Tender immature peas may be offered seasonally as supplemental food and enrichment.
- Soaked peas: Soaking softens dry seed but does not eliminate every antinutritional concern. Handle soaked peas hygienically and remove leftovers promptly.
- Sprouted peas: Use clean untreated seed under sanitary conditions with careful rinsing, drainage, and mold prevention.
- Young foliage: Clean leaves and tender vines may provide limited seasonal forage but should not be treated as concentrated protein feed.
Do not feed chemically treated planting seed, moldy or insect-damaged peas, spoiled soaked seed, contaminated sprouts, or unrestricted quantities of unidentified raw peas. Field peas should complement—not replace—an age-appropriate complete poultry ration.
📊 At a Glance
Cool-Season Protein and Soil-Building Crop🌱 Crop Snapshot
🐔 Backyard Chicken Planner Recommendation
Field peas are one of the more promising annual legumes for chicken keepers who want to produce a storable, homegrown ingredient with substantially more protein than most cereal grains. They fit especially well into gardens that have an open bed available before summer crops, a cool spring growing window, or a need for a nitrogen-fixing rotation crop.
Their greatest strength is versatility. The crop can be harvested early as green biomass, picked while the peas are tender, allowed to mature for dry seed, or terminated as a soil-building cover crop. Mature peas can be cleaned, dried, stored, cracked, coarsely ground, or incorporated into carefully designed supplemental mixtures.
Field peas still should not be treated as a complete poultry ration. Their protein content does not mean they provide every required amino acid in the correct proportion, and their feeding value varies among varieties and growing conditions. They work best when combined with complementary crops and a dependable complete feed rather than offered without limits.
Best For
- Growers seeking a cool-season protein crop.
- Gardens that need a legume in the crop rotation.
- Chicken keepers who can dry and store mature seed correctly.
- Properties with full sun and well-drained soil.
- Growers who can plant early enough to avoid severe heat during flowering.
- Flocks receiving peas as a measured supplement rather than an unrestricted staple.
- Gardeners interested in both poultry-feed production and soil improvement.
Think Twice If
- Your spring becomes hot before the crop can flower and fill pods.
- The planting site remains wet or drains poorly.
- Deer, rabbits, birds, or rodents cannot be excluded.
- You cannot dry harvested peas promptly and thoroughly.
- You expect field peas to replace a complete layer, grower, or chick ration.
- You do not know whether seed has been treated with a pesticide or fungicide.
- You plan to feed moldy, insect-damaged, sprouted, or weathered seed.
📋 Field Pea Quick Facts
Field peas combine several useful roles in one crop. They can produce edible seed, support nitrogen fixation, protect soil, interrupt some warm-season crop cycles, and supply residue for composting or mulching after harvest.
Beginner Friendly
Direct seeding is straightforward, but planting date, drainage, weed control, inoculation, and harvest timing affect success.
Protein Contribution
Dry field peas generally provide more protein than common homegrown cereal grains, making them useful in diversified feed-crop systems.
Cool-Season Growth
Seedlings tolerate cool conditions, and the crop normally performs best when flowering and pod filling occur before severe summer heat.
Nitrogen Fixation
Properly nodulated plants can obtain much of their nitrogen through their relationship with compatible soil bacteria.
Inoculant Value
The correct pea inoculant is inexpensive insurance where field peas or related legumes have not been grown successfully in recent years.
Trellis Requirement
Field peas are commonly grown without a garden trellis, although low support, companion grain, or lodging-resistant varieties may simplify harvest.
Harvest Flexibility
Plants can be used as a cover crop, grazed cautiously, harvested green, or allowed to mature fully for dry seed.
Storage Potential
Clean peas dried to a stable condition can remain useful for an extended period when protected from moisture, insects, rodents, and heat.
Feeding Limitation
Field peas do not supply every nutrient or essential amino acid in the proportions required for a complete poultry diet.
🧭 What You’ll Learn
This guide explains how to choose a suitable field pea type, decide between spring and winter production, prepare and inoculate seed, establish a productive stand, manage weeds and moisture, harvest peas at several stages, dry mature seed, store it safely, and use it conservatively around a backyard flock.
Crop Selection and Planning
- How field peas differ from garden peas and cowpeas.
- How spring field peas differ from winter field peas.
- Where Austrian winter peas fit into the field-pea group.
- How to select varieties for grain, forage, cover crops, or household use.
- Why local maturity and disease adaptation matter.
- How field peas fit before or after warm-season garden crops.
Planting and Establishment
- When to plant according to climate and intended use.
- How cool the soil can be at planting.
- Why field peas are normally direct-seeded.
- How planting depth changes with soil texture and moisture.
- How row spacing affects weeds, airflow, and harvest.
- When a support crop or low trellis may be helpful.
Soil Fertility and Inoculation
- Why field peas should not automatically receive heavy nitrogen fertilizer.
- How Rhizobium bacteria form nodules on pea roots.
- How to choose the correct pea-and-vetch inoculant.
- How to apply inoculant without killing the bacteria.
- How soil acidity affects nodulation and nutrient use.
- How to check roots for active nitrogen-fixing nodules.
Seasonal Crop Management
- How to control weeds while seedlings are small.
- When field peas need the most dependable moisture.
- How excessive nitrogen can encourage vine growth and lodging.
- How heat affects flowering and pod set.
- How airflow and crop rotation reduce disease pressure.
- How to protect plants from deer, rabbits, birds, and rodents.
Harvest and Storage
- When to harvest tender green peas.
- How to recognize physiological maturity and dry-down.
- How to cut, thresh, screen, and clean a small planting.
- Why damp peas should never be sealed in storage.
- How to reduce cracking and seed loss during handling.
- How to inspect stored peas for insects, moisture, mold, and rodents.
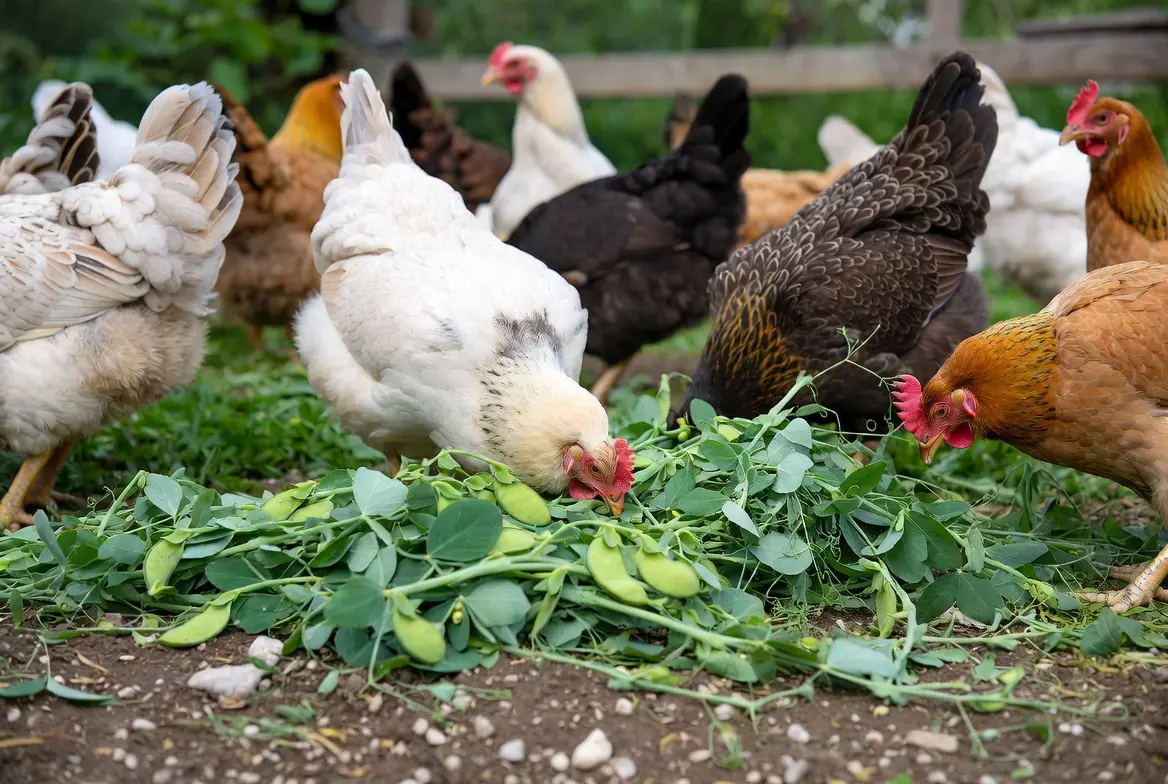
🐔 How to Feed Field Peas to Chickens
Field peas can provide useful plant protein, starch, and lysine that complement energy-rich grains such as field corn, wheat, barley, oats, millet, and grain sorghum. They should remain a measured supplemental ingredient rather than replacing a complete poultry ration.
Field peas may be used in several forms:
- Clean mature dry peas offered whole, cracked, or coarsely ground
- Plain cooked and cooled peas
- Fresh green peas used as seasonal enrichment
- Hygienically soaked peas offered promptly
- Carefully produced sprouts from untreated seed
- Limited browsing of clean young leaves and tender vines
- Know the variety and whether the seed was chemically treated.
- Inspect dry peas for mold, insects, discoloration, and unpleasant odors.
- Crack or coarsely grind peas when easier mixing or smaller particles are useful.
- Introduce unfamiliar supplements gradually.
- Use field peas with complementary ingredients rather than as the only feed.
- Continue providing age-appropriate complete poultry feed.
Never feed peas that are moldy, musty, damp, heated, insect-infested, rodent-contaminated, chemically treated, slimy, unintentionally fermented, or foul smelling.
🌱 What Are Field Peas?
Field peas (Pisum sativum) are cool-season annual legumes grown throughout much of the world for dry edible seed, livestock feed, cover cropping, forage production, and soil improvement. Although they belong to the same species as the sweet garden peas commonly found in home vegetable gardens, field peas have been bred for very different purposes. Rather than producing large quantities of sweet green peas for the dinner table, many field pea varieties are selected for dependable dry-seed production, standability, disease resistance, and adaptation to broad-acre agriculture.
For backyard chicken keepers, field peas are particularly interesting because they produce considerably more protein than most homegrown cereal grains while also contributing nitrogen to the soil through their partnership with naturally occurring Rhizobium bacteria. This combination allows one crop to improve garden fertility while also producing a useful supplemental feed ingredient for poultry.
Unlike warm-season protein crops such as soybeans or cowpeas, field peas thrive in cool weather. They germinate in relatively cool soil, tolerate light spring frosts once established, and perform best when flowering and filling pods before the arrival of prolonged summer heat. Because of this growth habit, they fit naturally into many backyard gardens where the spring growing season would otherwise remain unused.
🫛 Field Peas vs. Garden Peas
One of the most common sources of confusion is that both garden peas and field peas belong to the same species. While they share many botanical characteristics, decades of plant breeding have produced crops intended for very different uses.
| Characteristic | Garden Peas | Field Peas |
|---|---|---|
| Primary Purpose | Fresh eating | Dry grain, livestock feed, cover crop, forage |
| Harvest Stage | Immature green peas | Usually mature dry seed |
| Sweetness | High | Generally much lower |
| Protein Production | Moderate | Higher dry matter production and better feed value |
| Commercial Use | Vegetable crop | Pulse crop |
| Best Use for Chickens | Occasional fresh treats | Supplemental feed ingredient after proper handling |
Garden peas certainly make an enjoyable seasonal treat for chickens, but field peas are specifically the crop most people are referring to when discussing homegrown poultry feed ingredients.
🌾 Field Peas vs. Cowpeas
Field peas and cowpeas are both legumes that can contribute protein to a backyard chicken feed system, but they grow best in different climates and provide different seasonal advantages.
Because both crops have "pea" in their common name, many gardeners assume they are closely related. In reality they are quite different plants adapted to opposite growing seasons.
| Field Peas | Cowpeas |
|---|---|
| Cool-season crop | Warm-season crop |
| Excellent frost tolerance while young | Killed by frost |
| Dislikes prolonged heat during flowering | Thrives in summer heat |
| Spring or winter planting | Late spring or summer planting |
| Species: Pisum sativum | Species: Vigna unguiculata |
Many Backyard Chicken Planner users may eventually grow both crops. Field peas can occupy the cool months of the year before giving way to cowpeas as temperatures climb. Together they provide a nearly season-long supply of legume biomass while reducing the need for purchased nitrogen fertilizer.
Backyard growers comparing protein-producing feed crops may also want to compare field peas with cowpeas and soybeans , which provide different growing-season advantages and nutritional roles.
❄️ Spring Field Peas vs. Winter Field Peas
Not all field peas are planted at the same time of year. Choosing the correct seasonal type is one of the biggest factors affecting success.
Spring Field Peas
- Planted as soon as the soil can be worked.
- Excellent choice for most northern and temperate climates.
- Flowers before intense summer heat arrives.
- Usually harvested during early to mid-summer.
- Common choice for dry seed production.
Winter Field Peas
- Planted during autumn.
- Remain vegetative during winter.
- Resume rapid growth the following spring.
- Require winter-hardy varieties.
- Often used as cover crops and forage.
Gardeners should never assume a variety labeled simply "field pea" is winter hardy. Many spring varieties are severely damaged or killed by prolonged freezing temperatures, while winter-adapted varieties have been specifically selected for improved cold tolerance.
🌿 What About Austrian Winter Peas?
Austrian Winter Pea deserves special mention because it is one of the most widely planted legumes used in home gardens, orchards, food plots, and cover-cropping systems.
Although often discussed as though it were an entirely separate crop, Austrian Winter Pea is simply a winter-hardy type of field pea. Its greatest strengths are vigorous cool-season growth, dependable nitrogen fixation, abundant spring biomass, attractive purple flowers, and good compatibility with companion crops such as cereal rye, wheat, oats, and barley.
Many backyard chicken keepers grow Austrian Winter Peas primarily for their soil-building benefits rather than maximum dry-seed production. Chickens often enjoy browsing young foliage under supervised conditions, but most gardeners terminate the crop and incorporate the residue before planting warm-season vegetables.
🐔 Are Field Peas Worth Growing for Chickens?
For many backyard flocks, the answer is yes—but with realistic expectations.
Field peas produce significantly more protein than crops such as corn, oats, barley, wheat, or sorghum, making them one of the better annual protein crops available to home gardeners. They also contribute organic matter to the soil, support beneficial nitrogen fixation, attract pollinating insects during bloom, and leave the garden in excellent condition for the following crop.
At the same time, field peas are not a complete poultry feed. They should be viewed as a supplemental ingredient within a balanced feeding program rather than as a direct replacement for commercial layer or grower rations. Backyard chicken keepers who understand this distinction often find field peas to be one of the most rewarding crops in an integrated feed garden.
Field peas are especially valuable when combined with other homegrown feed crops. Protein-focused legumes can complement energy-producing grains such as field corn , wheat , and barley to create a more balanced feed garden.
🌾 Why Grow Field Peas for Chickens?
Most garden crops grown for chickens fall into one of two broad groups. Cereal grains such as corn, wheat, oats, barley, millet, and sorghum are useful sources of dietary energy, while leafy crops such as kale, clover, mulberry, and comfrey contribute greenery, enrichment, and selected nutrients. Field peas help fill the space between those groups by producing a dry seed that contributes both starch and a meaningful amount of protein.
That does not make field peas a complete chicken feed, but it does make them valuable in a diversified feed-growing system. A gardener may harvest mature peas for storage, offer small amounts of green peas during the growing season, allow limited browsing of clean young plants, and return the remaining roots and residue to the soil.
Homegrown Protein Ingredient
Field peas generally contain substantially more crude protein than cereal grains. This makes them a useful crop for balancing the energy-heavy contribution of corn, barley, wheat, oats, millet, and sorghum.
Long-Term Storage
Mature peas can be dried and stored much more easily than succulent leaves or fresh garden produce. Properly handled seed gives the grower a feed ingredient that can be used gradually after the growing season ends.
Cool-Season Production
Field peas grow during periods when many warm-season feed crops cannot. Spring peas may be harvested before summer crops occupy the same ground, while winter types can protect suitable beds through the colder months.
Soil Improvement
When correctly inoculated and actively nodulated, field peas obtain nitrogen through biological nitrogen fixation. Their roots, fallen leaves, and post-harvest residue also contribute organic matter to the garden.
Multiple Harvest Options
The crop can be used for young foliage, tender green peas, mature dry peas, seed saving, cover-crop biomass, compost ingredients, or crop residue.
Rotation Flexibility
Field peas can occupy a cool-season window before crops such as corn, sorghum, cowpeas, pumpkins, winter squash, amaranth, sunflowers, or other summer vegetables.
🐔 Can Chickens Eat Field Peas?
Yes, chickens can eat field peas when they are clean, properly identified, safely stored, and offered as a supplemental ingredient within a balanced feeding program. Field peas can provide useful plant protein, starch, and amino acids that complement energy-rich crops such as corn, wheat, barley, oats, millet, and sorghum.
However, field peas should not replace a complete poultry ration by themselves. Chickens require a precise balance of amino acids, vitamins, minerals, calcium, and energy that field peas alone cannot provide.
Dry Field Peas
Mature dry peas can be stored and used as a supplemental feed ingredient when they are clean, free of mold and insects, and introduced gradually. Cracking or coarse grinding may improve handling and reduce waste.
Green Field Peas
Tender green peas can be offered seasonally as an enrichment food. They provide variety and moisture but should still be considered a supplement rather than a primary feed source.
Raw Field Peas
Raw field peas contain naturally occurring compounds that may affect nutrient availability. Variety, processing, and inclusion level influence their feeding value, so unrestricted feeding of unknown raw peas is not recommended.
Best Backyard Practice
Use field peas as one part of a diversified feed garden. Combine them with complementary crops and maintain access to a properly balanced poultry feed.
🥣 Understanding the Nutritional Value of Field Peas
Field peas are valued as a supplemental chicken feed crop because they provide more protein than many common cereal grains while complementing energy-focused crops such as corn and wheat.
Dry field peas are generally classified as a pulse crop: a dry edible seed harvested from a legume. Their seed contains protein, starch, fiber, minerals, and smaller amounts of fat. Exact composition varies with variety, soil fertility, rainfall, temperature, maturity, storage condition, and laboratory method.
Because of this variability, no single protein percentage should be treated as universally correct for every homegrown harvest. Published feed tables commonly place field peas in a moderate-protein range, but a laboratory feed analysis is the only dependable way to know the composition of a particular batch.
| Nutritional Feature | Practical Meaning for Chicken Keepers |
|---|---|
| Moderate to High Protein for a Garden Crop | Field peas normally contribute more protein than cereal grains, making them useful in a mixed feed-crop system. |
| Substantial Starch | Peas contribute energy as well as protein and should not be viewed as a protein concentrate identical to soybean meal. |
| Relatively Low Oil Content | They do not provide the high-fat energy contribution associated with oilseeds such as sunflower or soybeans. |
| Useful Lysine Contribution | Legumes generally complement cereal grains, which tend to be comparatively limited in lysine. |
| Limited Sulfur-Containing Amino Acids | Methionine and related amino-acid balance must still be addressed in a complete poultry diet. |
| Variable Antinutritional Factors | Variety, seed color, genetics, processing, and inclusion level influence how suitable a pea may be for poultry feeding. |
| Low Calcium for a Laying Ration | Field peas cannot supply the calcium concentration laying hens require for dependable shell production. |
One of the most important concepts is that crude protein alone does not determine whether an ingredient can support poultry. Chickens require individual amino acids in appropriate proportions. Field peas may contribute useful protein, but they cannot independently provide the balanced amino-acid profile, vitamins, minerals, calcium, available phosphorus, sodium, and energy concentration required by chicks, growers, laying hens, or breeding birds.
🧬 Antinutritional Factors in Field Peas
Like many legume seeds, field peas naturally contain compounds that help protect the seed but may interfere with digestion or nutrient use when present at sufficiently high concentrations. These may include trypsin inhibitors, lectins, tannins, phytate, and other biologically active compounds.
The amount and importance of these compounds vary considerably among pea varieties. Modern feed-grade peas may have relatively low levels of some antinutritional factors, while dark seed coats, colored flowers, older varieties, or unidentified seed may differ. Growing conditions and processing can also influence the final feeding value.
Trypsin Inhibitors
These compounds can reduce the activity of digestive enzymes involved in protein digestion. Their concentration varies among varieties and is generally lower in field peas than in raw soybeans, but it should not be ignored.
Tannins
Tannins are concentrated primarily in the seed coat of certain colored-flowered or dark-seeded pea types. They may reduce protein and energy availability when present at higher levels.
Lectins
Lectins are naturally occurring seed proteins whose activity differs among legumes and varieties. Heat treatment may reduce the activity of some lectins.
Phytate
Phytate binds part of the phosphorus and may also interact with minerals and proteins. Poultry cannot use all phytate-bound phosphorus without help from appropriate feed formulation or enzymes.
This does not mean field peas are automatically unsafe. They are used successfully in poultry diets when suitable varieties are selected and the entire ration is formulated appropriately. It does mean backyard growers should avoid assuming that unlimited whole raw peas are equivalent to a balanced feed.
🌱 How Field Peas Fix Nitrogen
Field peas do not create nitrogen by themselves. They form a mutually beneficial relationship with compatible bacteria that live in nodules on their roots. These bacteria convert atmospheric nitrogen gas into forms the plant can use. In return, the pea plant supplies the bacteria with carbohydrates produced through photosynthesis.
When the relationship is working well, a field pea crop can satisfy much of its own nitrogen requirement. This reduces the need for nitrogen fertilizer and allows the plant to produce protein-rich tissue without removing as much immediately available nitrogen from the soil as a non-legume crop would.
-
1. Seed Germination
The pea seed absorbs water, germinates, and begins producing roots. At this early stage, the seedling relies on stored nutrients and available soil nitrogen. -
2. Bacterial Recognition
Compatible rhizobia near the roots recognize chemical signals released by the pea plant and begin interacting with susceptible root hairs. -
3. Nodule Formation
The bacteria enter the root system and stimulate the formation of specialized nodules where biological nitrogen fixation can occur. -
4. Active Nitrogen Fixation
Once established, the bacteria convert atmospheric nitrogen into compounds that support plant growth and seed production. -
5. Residue Return
After the crop dies or is terminated, roots, nodules, leaves, and stems decompose. Nitrogen contained in that plant material gradually becomes part of the soil nutrient cycle.
🔎 How to Check Field Pea Nodulation
Good top growth does not prove that nitrogen fixation is occurring. Plants may appear green because the soil already contains available nitrogen, even if few effective nodules have formed.
The best way to evaluate inoculation is to carefully dig several representative plants after the crop has become established. Do not pull the plants straight from the ground, because nodules can tear away from the roots and remain behind in the soil.
- Use a small shovel or garden fork to lift the complete root system.
- Select plants from several areas rather than checking only one location.
- Gently wash or crumble soil away from the roots.
- Look for clusters of rounded or irregular nodules attached to the root system.
- Slice several nodules open with a clean blade.
- Look for pink or reddish coloration inside actively fixing nodules.
| What You Find | Likely Interpretation |
|---|---|
| Numerous Nodules With Pink or Reddish Interiors | The pea and bacteria relationship is active and biological nitrogen fixation is probably functioning well. |
| Small White or Pale Nodules | The nodules may be immature, inactive, ineffective, stressed, or beginning to decline. |
| Few or No Nodules | The correct bacteria may be absent, inoculant may have failed, soil conditions may be unfavorable, or excessive available nitrogen may have suppressed nodulation. |
| Dark, Soft, or Decaying Nodules | The nodules may be old, damaged, waterlogged, diseased, or no longer actively fixing nitrogen. |
Nodulation problems cannot always be corrected completely after the crop is established. Recording what happened will help improve inoculation, soil preparation, drainage, and fertility management for the next planting.
📍 Choosing the Right Growing Location
Field peas are adaptable, but their best grain production comes from a site that combines full sunlight, moderate fertility, dependable moisture, and excellent drainage. A poor location may produce attractive vines without a satisfactory dry-seed harvest.
Full Sun
Choose a location receiving at least six hours of direct sunlight, with eight or more hours preferable for strong flowering and pod development.
Good Air Movement
Airflow helps foliage dry after rain or irrigation and may reduce the duration of conditions favorable to leaf and stem diseases.
Reliable Drainage
Peas do not tolerate prolonged waterlogging. Saturated soil reduces root oxygen, interferes with nodulation, and increases the risk of root and seedling diseases.
Accessible Harvest Area
Dry-pea harvesting involves repeated inspection, cutting or pulling plants, drying, threshing, cleaning, and transporting seed. Leave enough room to work without trampling the crop.
Wildlife Protection
Young pea growth and developing pods may attract deer, rabbits, groundhogs, birds, and rodents. Fencing or netting may be necessary before damage begins.
Rotation Opportunity
Select a bed where peas have not been grown recently and where a warm-season crop can follow after harvest or termination.
☀️ Sunlight Requirements
Field peas perform best in full sun. The plants may survive in partial shade, but reduced light commonly produces weaker stems, more vine elongation, slower drying after rainfall, and fewer well-filled pods.
Shade can become especially problematic when peas are grown beside tall buildings, solid fences, evergreen trees, mature corn, or dense companion grains. Some support from a companion crop can reduce lodging, but excessive competition for light may lower pea seed production.
🪴 Soil Requirements
Field peas can grow in several soil textures, but they are best adapted to well-drained loam, silt loam, or sandy loam. Heavy clay may be productive when its structure and drainage are good, while very sandy soil may require more frequent irrigation and careful potassium management.
| Soil Characteristic | Preferred Condition | Why It Matters |
|---|---|---|
| Texture | Loam, silt loam, or well-managed sandy loam | These soils provide a useful balance of drainage, moisture retention, aeration, and root penetration. |
| Drainage | Well drained | Saturated conditions interfere with germination, root health, nodulation, and disease resistance. |
| Organic Matter | Moderate and stable | Organic matter improves soil structure and moisture management without requiring heavy fresh-manure applications. |
| Compaction | Minimal | Compacted soil restricts roots, reduces oxygen, and may cause water to remain near the surface. |
| Surface Condition | Firm beneath the seed with loose soil above it | Good seed-to-soil contact supports uniform water uptake and emergence. |
| Salinity | Low | Field peas are relatively sensitive to saline soil and saline irrigation water. |
⚗️ Preferred Soil pH
Field peas generally perform best in slightly acidic to neutral soil. A practical target for many gardens is approximately pH 6.0 to 7.5, although local soil type and extension recommendations should guide lime and fertilizer decisions.
Strongly acidic soil can reduce root growth, interfere with nutrient availability, limit survival of compatible rhizobia, and restrict effective nodulation. Extremely alkaline soil may also create micronutrient problems.
Below the Preferred Range
Use a laboratory soil test to determine whether lime is needed. Apply lime far enough ahead of planting for it to begin reacting with the soil rather than guessing at an application rate.
Within the Preferred Range
Do not add lime automatically. Unnecessary liming can raise pH beyond the crop’s useful range and affect nutrient availability.
Above the Preferred Range
Avoid trying to lower the entire garden quickly with aggressive amendments. Select adapted crops, use organic matter appropriately, and follow local soil-test guidance.
💧 Drainage and Moisture Management
Field peas need moisture, but they also need oxygen around their roots. The goal is consistently moist—not saturated—soil during establishment, flowering, and pod filling.
Poor drainage can cause seed decay before emergence, yellowing, root rot, weak nodulation, stunting, and premature plant death. Raised beds, broad mounded rows, drainage channels, or a different planting location may be necessary where water commonly stands after rainfall.
| Growth Stage | Moisture Priority | Primary Risk |
|---|---|---|
| Germination and Emergence | Keep the seed zone evenly moist without saturating it. | Dry soil delays germination; waterlogged soil encourages decay. |
| Early Vegetative Growth | Encourage steady root development while avoiding frequent shallow watering. | Shallow irrigation can produce a shallow root system and greater drought sensitivity. |
| Flowering | Prevent severe moisture stress. | Drought and heat can reduce flower retention and pod set. |
| Pod Filling | Maintain dependable moisture as seeds enlarge. | Water stress can reduce seed size and increase poorly filled pods. |
| Final Dry-Down | Reduce unnecessary irrigation as the crop matures. | Excessive moisture delays harvest and increases staining, lodging, shattering, and disease risk. |
🧪 Fertility and Soil Testing
Field peas fix nitrogen, but they still require adequate phosphorus, potassium, sulfur, and other nutrients. The correct amounts depend on existing soil fertility, soil texture, organic matter, expected yield, and regional conditions.
A soil test should be completed before planting whenever possible. It is far more useful than applying a balanced fertilizer automatically. Products such as 10-10-10 provide equal percentages of nitrogen, phosphate, and potash whether the soil needs them or not.
Nitrogen
Heavy nitrogen applications are normally unnecessary when peas are properly inoculated. High available nitrogen may favor vine growth, delay nodulation, increase lodging, and reduce the crop’s incentive to fix nitrogen biologically.
Phosphorus
Adequate phosphorus supports root development, energy transfer, flowering, and seed production. Apply it only according to soil-test need and local recommendations.
Potassium
Potassium supports water regulation, stem strength, stress tolerance, and crop development. Sandy soils and heavily cropped gardens may be more likely to require supplementation.
Sulfur and Micronutrients
Deficiencies are regional and soil-specific. Do not add sulfur, boron, zinc, or other micronutrients without evidence because excessive applications can damage crops or accumulate in soil.
🔄 Crop Rotation
Field peas should not be planted repeatedly in the same bed. Closely spaced pea crops allow disease organisms and certain pests to build up in soil and crop residue. Rotation also gives the gardener an opportunity to alternate plant families, rooting patterns, harvest seasons, and nutrient demands.
A longer rotation is especially valuable where peas have experienced root rot, wilt, Ascochyta-related disease, powdery mildew, or other recurring problems. Exact rotation intervals should follow the disease history and local extension recommendations.
Good Crops to Follow Field Peas
- Corn
- Grain sorghum
- Proso millet
- Amaranth
- Sunflowers
- Pumpkins and winter squash
- Warm-season vegetables
- Cowpeas where the disease rotation remains appropriate
Avoid Immediate Repetition With
- Another field pea crop
- Garden peas
- Other closely related Pisum sativum types
- Seed lots carrying the same disease risks
- Crops known to share a diagnosed soilborne disease
🌾 Companion Crops and Living Support
Field peas are commonly grown alone, but they can also be planted with a small grain. The grain contributes upright stems and fibrous roots, while the pea contributes nitrogen-fixing potential and protein-rich biomass.
| Companion Crop | Potential Benefit | Possible Limitation |
|---|---|---|
| Oats | Fast cool-season growth, compatible maturity, weed competition, and physical support for pea vines | Dense oats may outcompete peas for light, water, and nutrients. |
| Barley | Early growth, upright structure, grain production, and support against lodging | Barley can become overly competitive when seeded too heavily. |
| Wheat | Strong support, winter or spring options, and useful grain or residue | Maturity may not align perfectly with every pea variety. |
| Cereal Rye | Excellent winter hardiness, erosion control, weed suppression, and upright biomass | Rye may dominate the mixture and can complicate spring termination. |
| Triticale | Good biomass, upright growth, and possible winter compatibility | Seed availability and regional adaptation vary. |
Mixed stands must be planned according to the intended harvest. A mixture designed for grazing or cover-crop biomass may use different proportions than one intended to produce clean pea seed. Separating mature pea seed from cereal grain can also be difficult without screens or mechanical cleaning equipment.
🧹 Preparing the Seedbed
Field peas germinate most uniformly in a firm, level seedbed with good seed-to-soil contact. The soil should be loose enough for root penetration but not so fluffy that seed is placed at inconsistent depths or dries out rapidly.
- Remove large weeds, old crop stems, stones, and heavy surface debris.
- Collect a representative soil sample before adding lime or fertilizer.
- Correct serious drainage problems before planting.
- Incorporate only the amendments recommended by the soil test.
- Break large clods without pulverizing the soil into fine powder.
- Level the planting area so seed depth remains consistent.
- Firm excessively loose soil with the back of a rake, roller, board, or light irrigation.
- Create rows only after the bed is level and ready to plant.
A useful test is to walk across the prepared bed. Your footprint should be visible, but your foot should not sink deeply into loose soil. Seed planted into an excessively fluffy bed often ends up deeper than intended after rain or irrigation settles the soil.
🦠 Choosing the Correct Field Pea Inoculant
Legume inoculants are not interchangeable. Field peas require compatible strains of nitrogen-fixing bacteria, commonly sold as a pea-and-vetch inoculant or identified by suppliers as the inoculation group intended for peas, lentils, and certain vetches.
The modern scientific classification printed on products may vary, but field pea inoculants commonly contain compatible strains associated with Rhizobium leguminosarum symbiovar viciae. The important practical step is to select a product whose label specifically lists field peas or Pisum sativum.
Use Inoculant When
- Field peas have never been grown in the bed.
- No related pea crop has been grown there in recent years.
- Previous peas produced few active nodules.
- The soil has been disturbed, eroded, flooded, or heavily amended.
- You are planting into imported soil or a new raised bed.
- You want inexpensive insurance against poor nodulation.
Replace the Product When
- The expiration date has passed.
- The package has been stored in a hot vehicle or direct sun.
- The inoculant has frozen contrary to label directions.
- The package is wet, contaminated, or damaged.
- The product does not list field peas as a compatible crop.
- You cannot verify how it was stored before purchase.
🫛 How to Inoculate Field Pea Seed
Always follow the product label because inoculants differ in formulation, concentration, application rate, adhesive requirement, and storage instructions. The following process describes a common small-garden approach rather than replacing the manufacturer’s directions.
1. Prepare the Planting Area First
Complete the rows, planting tools, labels, and irrigation setup before opening the inoculant. Treated seed should be planted promptly.
2. Move Into the Shade
Keep both seed and inoculant away from direct sunlight. Work in a garage, shed, covered porch, or shaded outdoor location.
3. Measure the Seed
Place only the quantity of seed you expect to plant immediately into a clean bucket, tub, heavy bag, or other mixing container.
4. Apply the Recommended Adhesive
Some products are applied dry, while others adhere better when the seed is lightly moistened with water or a label-approved sticking agent. The seed should be tacky rather than dripping wet.
5. Add the Inoculant
Apply at least the labeled amount and gently mix until the seed receives an even coating. Avoid creating excessive dust.
6. Plant Promptly
Place the inoculated seed into moist soil as soon as practical and cover it immediately to protect the bacteria from sunlight and drying.
7. Irrigate When Needed
If the seed zone is dry, provide gentle irrigation after planting. Avoid flooding the row or washing seed out of position.
⚠️ Protecting the Inoculant
Successful inoculation depends on keeping enough bacteria alive until they reach the root zone. Several common handling mistakes can greatly reduce their survival.
- Store unopened inoculant according to the label, usually in a cool location away from sunlight.
- Do not leave the package or treated seed in a hot vehicle.
- Do not mix inoculant into chlorinated water unless the product label permits it.
- Do not combine it with fertilizer, pesticides, or seed treatments unless compatibility is confirmed.
- Do not inoculate seed hours or days before planting unless the specific product allows pre-inoculation.
- Do not expose treated seed to direct sun while preparing additional rows.
- Do not assume a dark coating on commercially treated seed is Rhizobium inoculant.
- Do not feed any seed that has been chemically treated for planting.
Some fungicide seed treatments can reduce bacterial survival, especially when inoculant remains in prolonged contact with treated seed. When chemically treated seed must be planted, follow compatibility instructions from the inoculant and seed-treatment manufacturers.
🌿 Should You Add Nitrogen Fertilizer?
A properly inoculated field pea crop normally requires little or no added nitrogen. Applying substantial nitrogen before planting may reduce nodulation because the plant can obtain nitrogen directly from the soil rather than investing energy in its bacterial partnership.
There are situations where local agronomic recommendations may include a small starter amount, but this should not become an automatic backyard practice. Existing soil nitrogen, previous manure applications, compost history, organic matter, crop residue, and regional research all affect the decision.
| Situation | Preferred Response |
|---|---|
| No Soil Test and No Known Deficiency | Avoid applying heavy nitrogen. Inoculate correctly and observe crop development. |
| Recent Heavy Manure or Compost Application | Do not assume more nitrogen is needed. Excess fertility may cause rank vine growth and lodging. |
| Poor Growth With No Nodules | Investigate pH, drainage, inoculant viability, soil temperature, root disease, compaction, and other nutrients before adding nitrogen blindly. |
| Yellow Plants With Active Pink Nodules | Consider water stress, root damage, disease, sulfur, potassium, pH, and other possible causes rather than assuming nitrogen deficiency. |
| Laboratory Recommendation for Starter Nitrogen | Follow the local crop-specific rate and placement instructions carefully. |
🛒 Choosing Field Pea Seed
The seed you choose determines much more than flower color or the appearance of the mature peas. Field pea varieties differ in maturity, vine length, lodging resistance, seed size, seed-coat color, disease tolerance, winter hardiness, intended market, and suitability for grain, forage, or cover-crop production.
For a backyard feed garden, the best variety is usually one that matures reliably in the local climate, stands reasonably well through harvest, and produces clean seed that can be handled with the equipment available. A highly productive commercial variety may still be a poor choice if it matures too late, falls flat before harvest, or requires machinery the grower does not have.
Dry-Grain Varieties
Choose these when the main goal is harvesting mature peas for drying, storage, seed saving, or use as a supplemental feed ingredient.
- Look for dependable maturity in your region.
- Favor good standability and lodging resistance.
- Consider semi-leafless varieties for easier harvest.
- Choose disease resistance suited to local conditions.
- Confirm whether the variety is spring or winter adapted.
Forage or Cover-Crop Varieties
These are selected primarily for vines, leaves, nitrogen fixation, grazing, green manure, or mixtures with small grains.
- May produce more vegetative growth.
- May have longer vines and greater lodging.
- May not mature as uniformly for dry-seed harvest.
- Often work well with oats, barley, wheat, rye, or triticale.
- May be the better choice when soil improvement is the main goal.
Spring Varieties
Spring field peas are planted early and complete their life cycle during spring and early summer. They are the most dependable choice where winters are too cold or variable for fall-seeded peas.
Winter Varieties
Winter-adapted peas are planted in autumn and resume growth in spring. Winter survival depends on variety, planting date, snow cover, soil drainage, and regional minimum temperatures.
🟡 Seed Color, Flower Color, and Feed Use
Field pea seed may be yellow, green, brown, gray, blue-green, mottled, or otherwise colored, depending on variety. Flower color and seed-coat characteristics may also provide clues about tannin concentration, although appearance alone is not a complete feed analysis.
Many modern yellow- and green-cotyledon dry-pea varieties have been developed for human food or livestock-feed markets and tend to have relatively light-colored seed coats. Some forage, winter, or older pea types may have darker seed coats and greater concentrations of tannins.
| Seed Characteristic | What It May Suggest | What It Does Not Prove |
|---|---|---|
| Light-Colored Seed Coat | The variety may have been selected for food or feed markets and may contain lower tannin concentrations than some dark-seeded types. | It does not prove the peas are nutritionally complete, untreated, disease-free, or suitable for unlimited feeding. |
| Dark or Mottled Seed Coat | The variety may be a forage, winter, wildlife, cover-crop, or older field type and may contain more seed-coat tannins. | It does not automatically make the peas poisonous or unusable. |
| Large Seed | Fewer seeds may be contained in each pound, requiring a higher weight of seed to establish a given plant population. | It does not necessarily indicate better yield, higher protein, or greater feeding value. |
| Small Seed | More seeds may be contained in each pound, potentially lowering the number of pounds required for planting. | It does not guarantee strong emergence, maturity, or disease resistance. |
🚫 Untreated Seed vs. Chemically Treated Seed
Field pea seed sold for agricultural planting may be untreated, inoculated, coated, or treated with one or more pesticides. Chemically treated planting seed is intended only for crop establishment and must never be fed to chickens.
Untreated Seed
- Has not been coated with planting pesticides.
- May be appropriate for growing a crop intended for feed.
- Still must be clean, viable, and correctly identified.
- Should be stored separately from harvested food and feed.
- May still require Rhizobium inoculation before planting.
Treated Seed
- May contain fungicides, insecticides, repellents, or other agricultural treatments.
- Often has a brightly colored coating or warning dye.
- Must remain in its original labeled container.
- Must not be fed to poultry or other animals.
- Must not be mixed with harvested peas.
- Must be disposed of according to the product label and local rules.
🧾 Start With High-Quality Seed
Field peas can carry seedborne diseases, and damaged or low-germination seed often produces an uneven stand. Starting with clean, tested seed is one of the most effective ways to reduce early crop failure.
- Purchase seed from a reputable source that identifies the crop and variety.
- Check the label for germination percentage and test date.
- Confirm whether the seed is treated, untreated, or pre-inoculated.
- Reject seed with mold, musty odors, insect holes, severe discoloration, or moisture damage.
- Avoid seed containing excessive broken peas, weed seeds, soil, stems, or foreign material.
- Do not plant seed harvested from a heavily diseased crop.
- Keep seed cool and dry until planting.
- Protect bags from mice, rats, insects, moisture, and direct sunlight.
Home-saved seed can work well when it came from healthy plants, matured fully, remained dry, and was stored correctly. Its germination should be tested before planting a large area.
🧪 How to Perform a Simple Germination Test
A germination test helps determine whether older or home-saved seed is still worth planting. It also allows the grower to adjust the planting amount when germination is below the percentage printed on a commercial seed tag.
1. Count a Seed Sample
Count 25, 50, or 100 representative peas. A sample of 100 makes the final percentage easiest to calculate, while 25 or 50 seeds may be more practical for a small seed supply.
2. Moisten a Paper Towel
The towel should be evenly damp but not dripping. Excess water can reduce oxygen and encourage decay.
3. Arrange and Roll the Seed
Spread the peas apart, fold or roll the towel, and place it in a loosely closed plastic bag or covered container to reduce moisture loss.
4. Keep the Sample Moderately Warm
Store it where temperatures remain suitable for germination and away from direct sun, freezing conditions, radiators, and excessive heat.
5. Check the Seed Daily
Maintain moisture, remove any badly decayed seed, and record peas that develop healthy roots and shoots.
6. Calculate Germination
Divide the number of normally germinated peas by the number tested, then multiply by 100.
📅 When to Plant Spring Field Peas
Spring field peas should be planted early enough that flowering and pod filling occur during cool weather. Unlike warm-season crops, peas do not need warm summer soil before planting. Seed can begin germinating at approximately 40°F, although emergence is slower in cold conditions.
The correct calendar date varies widely. In cold northern regions, planting may occur during April or May as soon as a workable seedbed is available. In the Upper South and similar climates, planting may begin in late winter or very early spring. In warmer southern regions, some spring-type peas may perform better when planted during the cool end of winter rather than waiting until traditional spring gardening begins.
| Climate Pattern | General Spring Planting Approach | Primary Concern |
|---|---|---|
| Cold Northern Winters | Plant as early as workable soil and local field conditions permit. | Waiting too long may push flowering into damaging summer heat. |
| Temperate or Upper-South Climate | Plant in late winter or early spring after prolonged waterlogging becomes unlikely. | Warm weather may arrive rapidly during flowering and pod fill. |
| Mild-Winter Southern Climate | Use locally adapted planting dates and consider whether a winter or very early spring crop is more dependable. | Spring-planted peas may encounter heat before producing a full dry-seed crop. |
| High-Elevation Location | Base planting on workable soil, frost pattern, and the length of the remaining cool season. | Late freezes may injure flowers even when seedlings tolerate the cold. |
| Cool Coastal Climate | A longer spring planting window may be available where summer temperatures remain moderate. | Humidity and prolonged leaf wetness may increase disease pressure. |
🍂 When to Plant Winter Field Peas
Winter field peas are planted in autumn early enough to germinate, develop roots, and establish several nodes before severe cold arrives. Planting too early may create excessive top growth that is vulnerable to winter injury, while planting too late may leave plants too small and poorly rooted to survive.
The best window depends on the variety’s winter hardiness, latitude, elevation, soil drainage, typical snow cover, and local freeze pattern. Austrian Winter Peas and other winter-adapted types are commonly used in fall cover-crop mixtures, but even these varieties are not equally winter hardy in every region.
Plant Early Enough To
- Allow dependable germination.
- Develop a useful root system.
- Produce several nodes before dormancy.
- Establish Rhizobium nodules where conditions permit.
- Provide soil cover before winter erosion begins.
Avoid Planting So Early That
- Plants produce excessive tender growth.
- Warm weather encourages rank vines before winter.
- Disease or insect pressure increases.
- The crop uses too much available soil moisture.
- Peas begin flowering before winter dormancy.
🌡️ Soil Temperature and Emergence
Field pea seed can germinate in soil near 40°F. Under cool field conditions, normal emergence may require approximately 10 to 14 days, while warmer suitable soil can produce faster emergence. Wet, compacted, crusted, or diseased seedbeds may delay or reduce the stand.
Field peas have hypogeal emergence, meaning the cotyledons remain beneath the soil surface. This protects growing points below ground during early development and helps young plants recover from some frost injury.
| Condition | Expected Effect |
|---|---|
| Cold but Well-Drained Soil | Germination and emergence may be slow, but healthy seed can establish successfully. |
| Cold and Saturated Soil | Seed decay, damping-off, and uneven emergence become more likely. |
| Moderately Cool, Moist Soil | This usually provides the best balance of rapid establishment and cool-season growth. |
| Warm Soil and Rising Air Temperatures | Emergence may be rapid, but the crop may reach flowering during damaging heat. |
| Dry Seed Zone | Seeds may swell partially, stop developing, or emerge unevenly after later rainfall. |
📏 Field Pea Planting Depth
A planting depth near 2 inches is commonly recommended for field peas when that depth places the seed firmly into moist soil. The exact depth should be adjusted for soil texture, moisture, crusting risk, and seedbed condition.
Peas should be planted deeply enough to reach dependable moisture but not so deep that seedlings exhaust their reserves before emerging. A useful agronomic rule is to place the seed at least one-half inch into moist soil rather than directly at the boundary between dry surface soil and moist soil below.
| Seedbed Condition | Practical Depth Approach |
|---|---|
| Moist Medium-Textured Soil | Approximately 1½ to 2 inches is often suitable when firm seed-to-soil contact can be maintained. |
| Dry Surface With Moisture Deeper Below | Plant deeply enough to reach stable moisture, provided the soil does not crust and the variety has strong seedling vigor. |
| Heavy Soil Prone to Crusting | Use the shallower end of the suitable range while still placing seed in moisture. |
| Loose Sandy Soil | A slightly deeper placement may help reach moisture, but do not exceed the seed’s practical emergence ability. |
| Wet, Cold Soil | Delay planting until the bed drains rather than placing peas shallowly into saturated mud. |
↔️ Row Spacing
Commercial dry field peas are commonly drilled in narrow rows approximately 6 to 12 inches apart. Narrow spacing helps the crop close its canopy and compete with weeds. A backyard grower may use somewhat wider rows when hand cultivation, harvesting access, or interplanting requires additional room.
| Planting Layout | Suggested Use | Considerations |
|---|---|---|
| 6–8-Inch Rows | Dense grain-style planting or small mechanically seeded areas | Provides faster canopy closure but leaves little room for hand cultivation. |
| 8–12-Inch Rows | General dry-seed production | Balances stand density, weed suppression, airflow, and efficient use of space. |
| 12–18-Inch Rows | Hand-planted garden beds | Improves access for shallow cultivation, inspection, and picking, but weeds receive more light between rows. |
| Wider Than 18 Inches | Special support systems, companion rows, or hand-harvested green peas | Requires stronger weed management and may reduce total plants per bed. |
The most important goal is establishing enough healthy plants to cover the soil without creating an excessively dense, humid canopy. Variety, rainfall, fertility, and vine length affect the spacing that works best.
🔢 Plant Population and Seeding Density
Field pea seeding rates should be calculated by viable seeds rather than by using one universal weight. Varieties differ greatly in seed size, with approximately 1,600 to 5,000 seeds possible in a pound. The same number of pounds can therefore produce very different plant populations.
Commercial grain guidance commonly targets approximately seven to eight established plants per square foot. Backyard growers may use this as a starting point for dense dry-seed plantings and then adjust for row access, variety, germination, growing purpose, and expected losses.
For example, if you want 8 established plants per square foot and expect 85 percent of viable seed to establish:
8 ÷ 0.85 = approximately 9.4 seeds planted per square foot.
Expected establishment is not identical to the germination percentage. A seed lot may test at 95 percent germination but establish fewer plants because of crusting, disease, insects, birds, rodents, planting injury, or adverse weather.
| Planting Goal | Density Approach |
|---|---|
| Dry-Grain Production | Aim for a relatively uniform, dense stand capable of covering the soil and supporting neighboring plants. |
| Hand-Picked Green Peas | Use rows and spacing that allow repeated access without crushing vines. |
| Cover Crop or Green Manure | Favor rapid ground coverage, while adjusting the pea rate when mixed with grains or other species. |
| Seed-Saving Plot | Provide enough separation, access, and labeling to preserve variety identity and remove diseased or off-type plants. |
| Trellised Garden Planting | Spacing may be adjusted along the support, but avoid creating a thick wall of damp foliage. |
⚖️ Why Pounds per Acre Can Be Misleading
Seed catalogs and cover-crop charts often express field pea rates in pounds per acre. This is useful for purchasing seed, but it does not account for differences in seed size, germination, or planting purpose.
A pound of small-seeded peas contains far more potential plants than a pound of large-seeded peas. For the most accurate planting, use the seed tag’s seeds-per-pound information or count and weigh a representative sample.
1. Determine the Planting Area
Measure the bed in square feet rather than estimating by sight.
2. Select the Desired Population
Choose a target based on dry grain, green harvest, cover cropping, trellising, or companion planting.
3. Adjust for Germination and Establishment
Increase the planted-seed number enough to account for seed that does not germinate or establish.
4. Convert Seeds to Weight
Use seeds per pound from the label, or weigh a counted sample and calculate the amount needed.
5. Record the Final Rate
Save the calculation, variety, germination percentage, seed source, and planting area for future comparison.
🧮 Small-Garden Seed Calculation Example
Suppose a grower has a 4-by-20-foot bed, giving a total planting area of 80 square feet. The goal is eight established plants per square foot.
| Calculation Step | Example |
|---|---|
| Desired Established Plants | 80 square feet × 8 plants = 640 established plants |
| Expected Establishment | Assume 85 percent, written as 0.85 |
| Seeds to Plant | 640 ÷ 0.85 = approximately 753 seeds |
| Seed Size | Assume the seed lot contains 2,500 seeds per pound |
| Approximate Seed Weight | 753 ÷ 2,500 = approximately 0.30 pound |
This example is for explaining the calculation, not prescribing a universal rate. Actual seed size, germination, bed layout, row spacing, variety, and intended harvest must be used for the final planting plan.
🪴 Planting Field Peas in Garden Rows
Rows are usually the most manageable method for a backyard crop intended for dry seed. They make planting depth easier to control and allow the grower to inspect emergence, remove weeds, support vines, and harvest plants without walking through the entire stand.
1. Mark Straight Rows
Use string, a board, or the edge of a hoe to maintain consistent spacing and simplify later cultivation.
2. Open the Furrow
Create a uniform furrow deep enough to place seed into moist soil without leaving loose clods beneath it.
3. Place Inoculated Seed
Distribute seed evenly according to the calculated population. Avoid dropping large clusters followed by empty spaces.
4. Cover Promptly
Return soil over the peas immediately so inoculant is protected from light and drying.
5. Firm the Row
Press gently with the back of a rake, a board, a roller, or light foot pressure to improve seed-to-soil contact without compacting the entire bed.
6. Label the Planting
Record variety, source, treatment status, inoculant, planting date, row spacing, and expected maturity.
7. Water When Needed
Apply gentle irrigation if the seed zone lacks adequate moisture. Avoid exposing, moving, or concentrating seed with a forceful stream.
🌧️ Broadcasting Field Peas
Broadcasting spreads seed across the soil surface before incorporation. It can be useful for cover crops, orchard alleys, larger garden areas, and plantings intended primarily for biomass rather than clean dry-seed harvest.
Broadcast rates are normally higher than drilled rates because seed depth and seed-to-soil contact are less uniform. Seed left exposed is also more vulnerable to birds, rodents, drying, and failed germination.
- Prepare a level, relatively weed-free seedbed.
- Divide the seed into two equal portions.
- Spread the first portion while walking in one direction.
- Spread the second portion while walking perpendicular to the first pass.
- Incorporate seed promptly with shallow tillage, raking, harrowing, or another suitable method.
- Confirm that most seed reaches an appropriate depth rather than remaining on the surface.
- Firm the soil after incorporation to improve contact.
- Protect the area from chickens and wildlife during establishment.
🌾 Planting Field Peas With a Companion Grain
A companion grain can provide physical support, additional feed or biomass, improved ground cover, and stronger weed competition. The main risk is allowing the grain to dominate the peas.
When field peas are mixed with oats, barley, wheat, rye, or triticale, the seeding rate of one or both crops is commonly reduced from its full monoculture rate. The correct proportion depends on whether the goal is forage, cover, grain, wildlife habitat, or a harvestable mixture.
Mixed in the Same Row
The plants interact closely and can support one another, but separating the grain and peas after harvest may be difficult.
Alternating Rows
This allows some physical support and diversity while making harvest, observation, and seed separation more manageable.
Border or Support Rows
Grain planted beside pea rows may reduce lodging without competing throughout the entire bed.
Cover-Crop Mixture
Precise seed separation is unnecessary when the entire stand will be grazed, mowed, rolled, composted, or incorporated as green manure.
🪜 Do Field Peas Need a Trellis?
Field peas are commonly grown without trellises. Commercial stands rely on plant density, tendrils, neighboring plants, semi-leafless growth habits, or companion grains for support.
A small backyard planting may benefit from low netting, strings, brush, stakes, or a short fence when the chosen variety has long vines or the garden is prone to lodging. Support can improve airflow, keep pods away from damp soil, and simplify hand harvest.
| Situation | Support Recommendation |
|---|---|
| Short Semi-Leafless Dry-Pea Variety | Usually no formal trellis is needed if plant density and standability are good. |
| Long-Vined Forage or Winter Pea | Low support or a companion grain may reduce lodging. |
| Hand-Picked Green Peas | A trellis may improve access and keep pods cleaner. |
| Humid or Disease-Prone Garden | Support may improve airflow, although wider spacing and crop rotation remain important. |
| Large Grain-Style Planting | Trellising is normally impractical; select a variety with good harvestability. |
💦 Watering After Planting
Pea seed absorbs a substantial amount of water during germination. The seed zone should remain moist enough for continuous development, but repeated saturation must be avoided.
- Check moisture at planting depth rather than judging only the soil surface.
- Water gently enough that seed remains covered.
- Allow poorly drained beds to recover after heavy rain before adding irrigation.
- Avoid frequent light sprinkling that moistens only the upper surface.
- Inspect for crusting after intense rainfall.
- Keep chickens out of newly planted beds to prevent scratching and compaction.
- Watch for rodent or bird digging along the rows.
Mulch is not normally applied heavily over newly seeded field peas because a thick layer can delay soil warming, obstruct emergence, hide rodents, and make uniform planting depth difficult. Light residue may be useful in some conservation systems, provided the seed is placed correctly into moist soil.
🌱 What Normal Emergence Looks Like
The first visible pea shoots may appear as curved or folded stems pushing through the soil. The cotyledons remain below ground, and true leaves begin unfolding as the shoot rises.
Emergence should be reasonably uniform across the bed. A few late seedlings are normal, but long empty sections suggest a problem with seed placement, moisture, pests, disease, crusting, or seed quality.
| Observation | Possible Cause |
|---|---|
| Entire Bed Is Slow | Cold soil, deep planting, low seed vigor, or insufficient accumulated warmth |
| Seed Is Swollen but Not Growing | Cold saturation, oxygen shortage, dead seed, chemical injury, or early decay |
| Seed Is Dry and Hard | The planting depth did not reach stable moisture. |
| Shoots Are Trapped Under a Crust | Fine soil was compacted by rainfall or irrigation. |
| Seed or Seedlings Have Disappeared | Birds, mice, voles, squirrels, chickens, or other animals may be responsible. |
| Seedlings Collapse Near the Soil Line | Damping-off, root disease, saturation, or physical injury may be involved. |
| Only Certain Rows Failed | Uneven depth, fertilizer contact, poor inoculant handling, irrigation patterns, or planting error may explain the difference. |
🧱 Managing Soil Crust After Planting
Heavy rain on finely prepared soil can produce a dense surface crust. Pea shoots may bend sideways or become trapped beneath it, even though germination occurred normally.
When crusting is discovered before seedlings emerge, gently roughen only the upper surface with a rake, hoe, hand cultivator, or other light tool. Work shallowly and avoid disturbing the seed row.
Long-term prevention includes preserving organic matter, avoiding pulverized seedbeds, reducing unnecessary tillage, maintaining soil aggregation, and preventing forceful overhead irrigation.
🔄 Should You Replant Missing Areas?
Do not replant immediately after the first seedlings appear. Cool soil can produce several days of variation in emergence, and disturbing the row too soon may damage seedlings that are still below the surface.
1. Wait for the Expected Emergence Period
Account for soil temperature, planting depth, variety, and recent weather before deciding that seed has failed.
2. Investigate Several Empty Spots
Dig carefully beside the row and examine the seed. Determine whether it is dry, swollen, rotted, missing, or producing a shoot.
3. Correct the Underlying Problem
Replanting into the same saturated, crusted, pest-infested, or fertilizer-damaged condition may produce a second failure.
4. Replant Only Meaningful Gaps
Small irregular spaces often close as neighboring plants branch and vine. Long empty sections are more likely to justify replanting.
5. Mark the Replanted Area
Later plants may flower and mature after the original stand, affecting harvest timing and seed moisture.
🐔 Keep Chickens Out During Establishment
Chickens can quickly destroy a newly planted pea bed. They may uncover seeds, eat emerging shoots, scratch inoculated soil away from the rows, compact wet ground, and create bare areas that fill with weeds.
- Fence the bed before planting rather than after damage begins.
- Use netting or solid barriers where birds can reach through ordinary wire.
- Anchor lightweight fencing so hens cannot push underneath it.
- Protect broadcast plantings especially carefully because seed is less uniformly buried.
- Do not allow access merely because shoots have appeared.
- Wait until plants are well established before considering any supervised browsing.
- Remove chickens immediately if they begin pulling whole plants from the ground.
🌿 Early Season Care
The first several weeks after emergence largely determine the success of the crop. During this period field peas are establishing their root system, forming nitrogen-fixing nodules, and beginning the rapid vegetative growth that will support flowering and pod production later in the season.
Young pea plants compete poorly against aggressive weeds. They also benefit from consistent soil moisture without prolonged saturation. A little attention during this stage often prevents much larger problems later in the season.
Inspect Frequently
Walk through the planting every few days during establishment. Early detection of weeds, insect damage, wildlife browsing, standing water, or poor emergence is much easier to correct than waiting several weeks.
Avoid Soil Compaction
Stay off the planting when the soil is wet. Compacted soil reduces oxygen around the roots, restricts growth, and interferes with normal nodulation.
Protect Young Plants
Seedlings are attractive to rabbits, deer, geese, and occasionally chickens. Temporary fencing during establishment often saves an entire crop.
Monitor Root Nodules
Several weeks after emergence, carefully examine representative plants for healthy nodules rather than assuming inoculation worked correctly.
🌱 Weed Control
Field peas compete surprisingly well once a healthy canopy develops, but they are relatively poor competitors immediately after emergence. Allowing weeds to become established during the first month can reduce yield, interfere with harvest, and increase humidity around the crop.
Mechanical weed control is usually the simplest option for backyard growers. Removing weeds while they are still small requires much less effort than trying to eliminate mature weeds later in the season.
| Growth Stage | Recommended Weed Management |
|---|---|
| Before Emergence | Destroy newly germinated weeds with shallow cultivation if necessary, taking care not to disturb planted seed. |
| Small Seedlings | Hand pull or lightly cultivate between rows before weeds become established. |
| Rapid Vegetative Growth | Allow the expanding pea canopy to shade many later-germinating weeds. |
| Flowering | Avoid aggressive cultivation that may damage roots or knock flowers from the plants. |
| Pod Fill | Remove only weeds that interfere with harvest or create disease problems. |
💧 Irrigation Throughout the Season
Although field peas tolerate short dry periods better than many vegetables, prolonged drought during flowering and pod development can significantly reduce yield. The objective is steady moisture—not continuously wet soil.
| Growth Stage | Water Requirement |
|---|---|
| Emergence | Maintain consistent moisture for uniform establishment. |
| Vegetative Growth | Water only as needed to encourage deeper root development. |
| Flowering | One of the most critical periods. Moisture stress may reduce pod set. |
| Pod Filling | Maintain adequate moisture while avoiding saturated soil. |
| Dry Down | Reduce irrigation and allow pods to mature naturally. |
Deep, infrequent irrigation generally encourages stronger root systems than frequent shallow watering.
🔥 Heat Stress
High temperatures are one of the primary reasons field pea crops fail in many home gardens. Vegetative growth often appears healthy even as flowering, pollination, and pod development begin to suffer.
When daytime temperatures remain consistently high during flowering, blossoms may abort before pods develop. Existing pods may also contain fewer or smaller seeds.
🥶 Frost Tolerance
Young field pea seedlings tolerate light spring frosts remarkably well compared with warm-season crops. Their growing point remains protected below the soil surface during early development, allowing many plants to recover from frost damage that would destroy beans or other tender vegetables.
Flowers and developing pods are much more sensitive than young vegetative growth. A late freeze during flowering can reduce yield even though the plants survive.
| Growth Stage | Typical Frost Response |
|---|---|
| Seed | Unaffected below ground after planting. |
| Emerging Seedlings | Generally tolerate light spring frosts. |
| Vegetative Plants | Usually recover from moderate frost. |
| Flowers | Can be damaged or aborted by freezing temperatures. |
| Developing Pods | Most sensitive stage of the crop. |
🌸 Flowering
Flowering marks the transition from vegetative growth to seed production. White, pink, or purple blossoms appear depending upon the variety. During this stage the crop is particularly sensitive to drought, prolonged heat, nutrient stress, and severe disease.
Flower production normally continues over several weeks rather than occurring all at once. Earlier flowers generally mature first, while later flowers may continue producing pods if weather remains favorable.
- Dark green foliage
- Firm upright stems
- Active new flowers
- Minimal yellowing
- No standing water around the roots
🐝 Pollination
Field peas are primarily self-pollinating. Unlike crops such as squash or cucumbers, they do not depend heavily upon bees to produce seed.
Nevertheless, flowering peas are visited by numerous beneficial insects including honey bees, native bees, hoverflies, and other pollinators collecting nectar or pollen. Maintaining healthy pollinator populations benefits many other crops growing nearby.
🫛 Pod Development
Once flowers have been successfully pollinated, pods begin enlarging rapidly. Seed development requires adequate moisture, sunlight, and healthy foliage capable of supporting photosynthesis.
Pods should gradually become plump and well filled. Flat pods, aborted pods, or poorly filled seeds often indicate stress earlier during flowering or pod fill.
- Inspect pods regularly as harvest approaches.
- Remove obviously diseased plants before problems spread.
- Continue monitoring wildlife damage.
- Avoid unnecessary cultivation near established roots.
- Reduce plant stress whenever possible.
🌾 Lodging
Lodging occurs when stems bend or collapse onto the ground before harvest. Heavy rain, wind, excessive nitrogen, vigorous vine growth, or certain varieties may all contribute.
Lodged plants are more difficult to harvest and dry. Pods resting on moist soil may also become stained or develop disease.
| Cause | Possible Solution |
|---|---|
| Excess Nitrogen | Avoid unnecessary nitrogen fertilization. |
| Tall Vining Variety | Use companion grain or light support. |
| Wind | Provide windbreaks where practical. |
| Heavy Rain | Maintain healthy drainage and avoid overwatering. |
| Dense Planting | Adjust future plant population if lodging becomes severe. |
🦌 Wildlife Protection
Wildlife damage can occur throughout the growing season. Deer often browse tender foliage, rabbits clip young stems, rodents consume developing seed, and birds occasionally remove newly planted peas.
Deer
Most severe during vegetative growth.
Rabbits
May clip seedlings at ground level.
Birds
Most likely to remove exposed seed immediately after planting.
Rodents
May feed on mature peas before harvest or during storage.
🍃 Diagnosing Yellow Leaves
Yellow foliage does not automatically indicate nitrogen deficiency. Numerous environmental and biological factors can produce similar symptoms.
| Possible Cause | Common Clues |
|---|---|
| Poor Nodulation | Few active nodules on the roots. |
| Root Rot | Wet soil, brown roots, poor vigor. |
| Drought Stress | Wilting during warm afternoons. |
| Waterlogged Soil | Yellow plants with saturated soil. |
| Natural Aging | Older lower leaves yellow as pods mature. |
| Disease | Leaf spots, lesions, mold, or distorted growth. |
Diagnosing the entire plant—including roots, stems, pods, recent weather, and soil conditions—is far more reliable than judging leaf color alone.
⏳ Field Pea Harvest Timeline
Field peas can be harvested at several different stages, and the correct timing depends on what you intend to use. Tender peas for fresh feeding are harvested while the pods remain green, while storage peas must remain on the plant long enough for the seed to reach full maturity and lose most of its moisture.
Do not judge the entire crop by one pod. Field peas flower over a period of time, so the lowest pods commonly mature before those near the top of the plant. A backyard grower may pick green peas repeatedly, but a dry-seed crop is normally harvested when most of the stand has matured enough to justify cutting or pulling the plants.
1. Vegetative Growth
Plants produce leaves, tendrils, stems, and nitrogen-fixing roots. This stage supplies the structure needed to support later flowering and seed production.
2. Flowering
Flowers begin opening along the vines. The crop is particularly sensitive to heat and moisture stress during this stage.
3. Early Pod Formation
Small, flat pods appear after successful flower development. Seeds are still tiny and undeveloped.
4. Green-Pea Stage
Pods enlarge and the peas become plump, tender, and moist. This is the preferred stage for fresh peas intended for household use or small, promptly consumed flock treats.
5. Seed-Fill Stage
Peas continue accumulating starch, protein, and dry matter. Pods remain green but become tougher as the seed matures.
6. Physiological Maturity
The seed has accumulated most of its final dry matter. Lower pods begin yellowing or turning brown while upper portions of the plant may still retain some green tissue.
7. Field Dry-Down
Leaves, stems, pods, and seeds lose moisture. Pods become papery or brittle, and the peas harden inside them.
8. Dry-Seed Harvest
The crop is cut, pulled, or collected before excessive pod shattering, prolonged wet weather, wildlife loss, or lodging reduces quality.
9. Final Drying and Cleaning
Harvested plants or threshed peas are dried further under cover, then cleaned and inspected before storage.
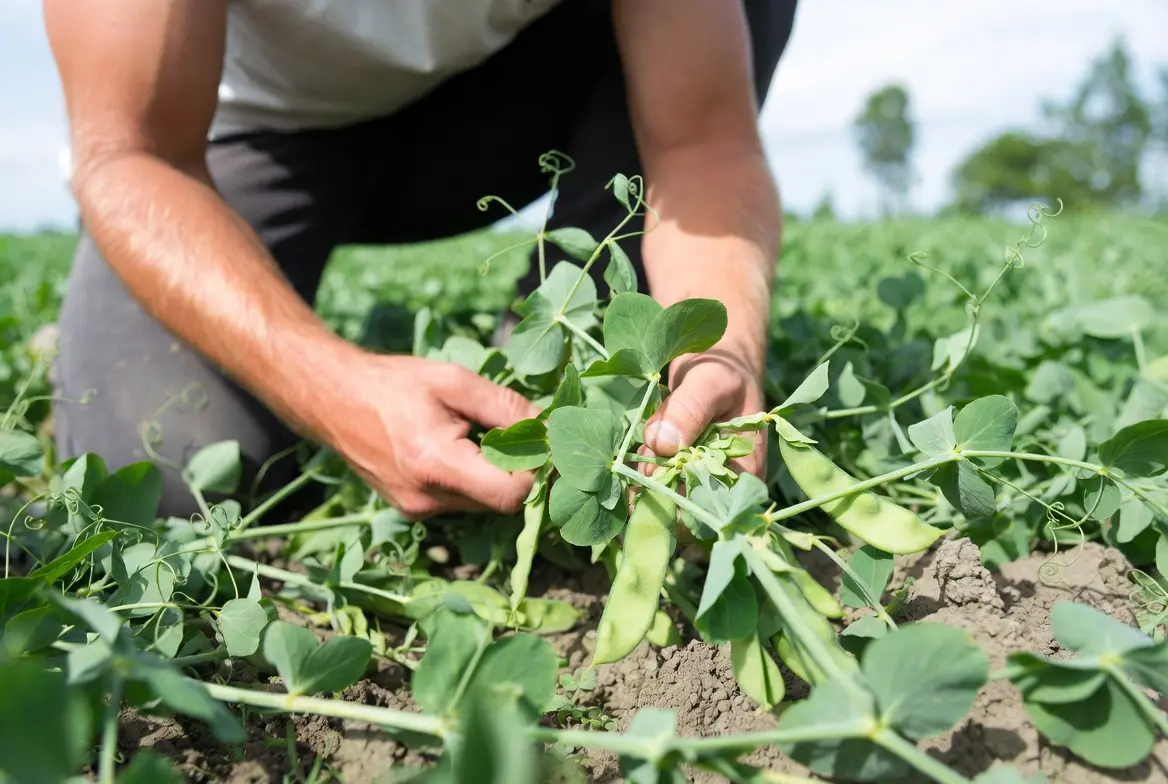
🫛 Harvesting Fresh Green Peas
Field peas can be harvested while immature and green, much like garden peas, although many field varieties are less sweet and may become starchy or tough quickly. Green peas contain much more water than mature dry peas and should be treated as a fresh, perishable food rather than a storage grain.
Harvest when the pods are well filled but remain green and flexible. The peas should be full-sized, tender when pressed, and easy to shell. Pods that have become pale, leathery, or strongly netted are moving beyond the best fresh stage.
- Pick after surface moisture from rain, dew, or irrigation has dried.
- Support the vine with one hand while removing the pod with the other.
- Avoid pulling entire plants from the soil during repeated harvests.
- Discard pods showing mold, decay, insect frass, unusual discoloration, or foul odors.
- Shell the peas soon after picking.
- Cool harvested peas promptly if they will not be used immediately.
- Use fresh peas before they become slimy, sour, moldy, or fermented.
🐔 Using Fresh Field Peas Around Chickens
Fresh green peas can provide enrichment and dietary variety, but they should remain a small addition to the flock’s complete ration. Because they contain substantial moisture, their nutritional concentration is much lower by weight than that of dry peas.
Offer only an amount the flock can consume promptly. Remove uneaten peas before they become dirty, trampled, sour, or attractive to flies and rodents.
| Fresh-Pea Form | Practical Use | Main Caution |
|---|---|---|
| Whole Shelled Green Peas | Scatter a small amount for adult birds as seasonal enrichment. | Do not allow them to replace substantial consumption of balanced feed. |
| Lightly Crushed Green Peas | May be easier for smaller birds to sample. | Crushed peas spoil faster and should be offered immediately. |
| Peas Mixed Into Moist Feed | Can add texture and variety to a promptly consumed mash. | Wet mixtures deteriorate rapidly and should not remain in the feeder. |
| Whole Green Pods | May provide supervised pecking and shelling activity. | Tough pods and fibrous material should not accumulate in the feeding area. |
| Frozen Green Peas | May be offered after thawing as an occasional warm-weather treat. | Use plain peas without salt, sauces, seasoning, butter, or spoiled freezer damage. |
🌾 When Are Dry Field Peas Ready to Harvest?
A dry-seed crop should remain in the garden until the peas are mature and most pods have begun drying. The plants gradually change from green to yellow, tan, or brown. Lower pods commonly mature first, followed by pods higher on the vines.
The crop is approaching hand harvest when most pods are dry or nearly dry, the peas have developed their mature color, and the seed is firm rather than soft when pressed with a fingernail.
- Most leaves have yellowed, dried, or fallen from the vines.
- The majority of pods have changed from green to yellow, tan, or brown.
- Mature pods feel papery rather than fleshy.
- Peas have reached their expected mature size and color.
- Seeds feel firm and no longer dent easily under light fingernail pressure.
- Dry pods may produce a rattling sound when shaken.
- Lower pods have not yet shattered in large numbers.
- Several days of reasonably dry weather are available for harvest and curing.
🔍 Understanding Physiological Maturity
Physiological maturity is the stage at which the seed has accumulated most of its final dry matter. The seed may still contain too much moisture for immediate storage, but further time on the plant primarily allows drying rather than substantial additional seed growth.
This distinction matters when poor weather threatens. A crop that has reached physiological maturity may be cut and dried under cover, while a crop harvested too early can produce lightweight, shriveled, immature peas with reduced storage and germination quality.
| Crop Condition | Likely Interpretation |
|---|---|
| Flat Green Pods With Tiny Seeds | The crop is still in early pod development and is far from dry-seed maturity. |
| Plump Green Pods With Tender Peas | Suitable for fresh harvest but not mature dry seed. |
| Full Pods Beginning to Yellow | Seeds are nearing or may have reached physiological maturity, depending on variety and pod position. |
| Mostly Yellow or Brown Pods With Firm Seed | The crop is entering the preferred hand-harvest period for further drying under cover. |
| Brittle Pods Splitting Open | The crop is very dry and harvest loss from shattering is increasing. |
| Pods Repeatedly Wetted After Maturity | Seed staining, weathering, sprouting, mold, and pod deterioration become greater concerns. |
🌦️ Choosing the Best Harvest Day
Whenever possible, harvest mature peas during a stretch of dry weather. Plants and pods should be free of rain or heavy dew before they are bundled, piled, bagged, or moved indoors.
Dry afternoon conditions can reduce surface moisture, but extremely brittle pods may shatter more easily during handling. In a very dry crop, harvesting during the cooler morning after dew has disappeared may reduce seed loss compared with handling the plants during the hottest part of the afternoon.
Good Harvest Conditions
- Pods are mature and mostly dry.
- No rain is clinging to the vines.
- Several hours of dry weather remain.
- The crop can be moved immediately to a protected curing area.
- Containers, tarps, and drying racks are ready.
Delay Harvest When
- Plants are wet from rain or irrigation.
- Pods feel damp, flexible, or leathery from humidity.
- Harvested vines would have to remain packed overnight.
- The drying area is not prepared.
- Mud would contaminate plants and equipment.
✂️ Hand-Harvesting a Small Field Pea Planting
Backyard growers can harvest dry peas by collecting individual pods, cutting entire plants, or pulling plants from the ground. The best approach depends on planting size, soil condition, crop uniformity, and whether the roots should remain in the garden.
Picking Individual Pods
This is practical for a very small or uneven planting. Mature pods can be collected over several visits while greener pods remain on the plant.
- Reduces the need to harvest immature pods.
- Requires repeated labor.
- Allows close inspection for disease and insects.
- Works well for seed-saving plants.
Cutting Whole Plants
Cut vines near the soil surface and move them onto a tarp, rack, or sheltered floor for final drying.
- Leaves roots and nodules in the soil.
- Allows efficient harvest of a uniform stand.
- Reduces soil contamination on the vines.
- Requires a suitable curing area.
Pulling Whole Plants
Pulling may be useful in loose soil or where plants must be removed quickly before rain.
- Removes roots and attached soil from the bed.
- May bring wet soil into the drying area.
- Removes some nitrogen-containing root residue.
- Can be difficult in compacted or dry ground.
🧺 A Step-by-Step Dry-Pea Harvest
1. Inspect the Entire Stand
Open pods from the lower, middle, and upper portions of several plants. Confirm that most seeds are mature and firm.
2. Remove Unsuitable Plants
Separate plants with severe mold, rot, unusual discoloration, heavy insect contamination, or suspected chemical exposure.
3. Spread a Tarp Beside the Crop
A clean tarp catches peas released from brittle pods during cutting and handling.
4. Cut or Gather the Plants
Use clean shears, a sickle, or another appropriate tool. Handle dry vines gently to reduce pod shattering.
5. Move Plants Under Cover
Carry the vines directly to a clean, dry, well-ventilated curing area protected from rain, poultry, rodents, and wild birds.
6. Spread the Crop Thinly
Arrange vines on screens, racks, tarps, tables, or a clean floor. Avoid deep, compact piles.
7. Turn the Plants Regularly
Redistribute vines so damp areas receive airflow and hidden green pods can continue drying.
8. Thresh Only When Pods Are Dry
Pods should break or split readily. Tough, leathery pods indicate that additional drying is needed.
🏠 Drying Pea Vines Under Cover
Harvested pea plants may require additional curing before threshing, especially when upper pods were still slightly green at cutting. The curing area should protect the crop from rainfall while allowing continuous airflow around the vines.
Suitable locations may include an open-sided shed, covered porch, barn loft, screened structure, ventilated garage, or another dry area that can be protected from animals and contamination.
- Use clean racks, screens, pallets, tarps, or food-safe surfaces.
- Keep vines off bare concrete if condensation or ground moisture is possible.
- Spread plants in shallow layers rather than deep heaps.
- Turn or loosen the material at least once daily during early curing.
- Use fans for airflow when humidity is high, without blowing seed and debris away.
- Protect the crop from chickens, rodents, cats, dogs, wild birds, and insects.
- Do not allow vehicle exhaust, fuel, pesticides, paint, or workshop chemicals near the crop.
- Inspect daily for heating, sour odors, condensation, mold, and damp pockets.
🪵 How to Thresh Field Peas by Hand
Threshing separates mature peas from their pods and vines. Fully dry pods break readily, while damp pods bend and resist opening. Waiting until the crop is properly cured makes threshing faster and reduces crushed plant material.
Hand Shelling
Open pods individually and remove the peas by hand.
- Best for small quantities.
- Produces clean seed.
- Allows diseased seed to be rejected immediately.
- Requires the most labor.
Tarp Method
Place dry plants between two clean tarps and walk, roll, or gently beat the material so pods break open.
- Useful for moderate backyard quantities.
- Catches scattered peas.
- Creates more chaff than hand shelling.
- Requires later screening and cleaning.
Bag or Pillowcase Method
Place a small amount of thoroughly dry pods into a strong clean sack and gently strike or roll it.
- Contains most seed and debris.
- Works best in small batches.
- Overfilling reduces effectiveness.
- A weak bag may tear and scatter the crop.
Bucket or Tub Method
Place dry pods into a large container and crush or stir them with a clean blunt tool.
- Keeps the work at a comfortable height.
- Reduces seed loss.
- Must be done gently to avoid cracking peas.
- All equipment should be clean and chemical-free.
🧹 Separating Peas From Pods and Chaff
After threshing, the mixture may contain whole peas, split peas, pod fragments, stems, leaves, soil, weed seed, insects, and other debris. Cleaning improves storage safety and makes later inspection much easier.
1. Remove Large Material
Pick out long stems, unopened pods, stones, and large clumps by hand.
2. Screen the Mixture
Use hardware cloth, seed-cleaning screens, colanders, or other clean sieves sized to retain peas while smaller debris falls through.
3. Recover Peas From Unopened Pods
Return dry unopened pods for another round of threshing rather than discarding them with the chaff.
4. Winnow Light Debris
Use a gentle breeze or low fan to move lightweight leaves and pod fragments away from the heavier peas.
5. Hand-Sort the Seed
Remove discolored, moldy, shriveled, insect-damaged, sprouted, broken, or suspicious peas.
6. Dry the Cleaned Peas Again
Spread the seed in a shallow layer so any moisture hidden beneath pod residue can escape before storage.
🫘 Sorting Peas Before Storage
Cleaning is more than improving appearance. Damaged seeds often absorb moisture more readily, support insects, and develop mold before sound peas do. Removing them reduces the chance that a small problem will spread through the entire container.
| Seed Condition | Recommended Action |
|---|---|
| Hard, Clean, Uniform Mature Peas | Retain for drying, storage, feed evaluation, or seed saving. |
| Small but Fully Mature Peas | May be retained for feed if clean and sound, but they are less desirable as planting seed. |
| Cracked or Split Peas | Separate and use first if they are otherwise sound and fully dry. |
| Shriveled or Lightweight Peas | Discard or compost unless their condition has been evaluated and found sound. |
| Moldy or Musty Peas | Do not feed, store, or use for seed. |
| Sprouted Peas From the Field | Separate because weathering and moisture exposure have reduced storage reliability. |
| Peas With Insect Holes | Remove and inspect the remainder of the lot carefully for active infestation. |
| Unusually Colored or Odorous Peas | Reject when the cause cannot be confidently identified as a normal variety characteristic. |
💨 Final Drying After Threshing
Peas that feel dry on the outside may still contain enough internal moisture to cause problems after sealing. Final drying after threshing gives moisture trapped inside pods, dense piles, or immature seeds another opportunity to escape.
- Spread peas no more than a few seeds deep on screens, trays, or clean cloth.
- Place them in a dry location with steady airflow.
- Stir or turn the seed at least once daily.
- Keep the drying layer protected from dust, insects, rodents, and poultry.
- Separate thicker, greener, or softer peas so they do not slow the entire batch.
- Check beneath the seed for condensation or dampness.
- Do not seal the peas until moisture is uniform throughout the batch.
University gardening guidance for saved peas recommends allowing pods to become dry and brown on the plant, then drying harvested pods or plants further under cover. For seed-saving quantities, this curing period may continue for roughly two weeks or longer depending on humidity, maturity, and airflow.
📊 Understanding Harvest and Storage Moisture
Commercial field-pea growers often harvest peas while they still contain more moisture than is desirable for long-term storage. Harvesting peas while they are slightly tough can reduce splitting and seed-coat cracking, but those peas must then be dried or aerated correctly.
Agricultural guidance may describe harvest moisture around 17 to 20 percent for reducing mechanical damage during combining. That commercial harvest range should not be confused with a safe long-term storage target.
| Moisture Situation | Practical Meaning |
|---|---|
| Very Wet or Soft Seed | Not ready for sealed storage. Heating, mold, respiration, and deterioration can occur quickly. |
| Commercial Harvest Moisture | May reduce cracking during mechanical harvest but requires managed aeration or drying. |
| Dry, Hard Seed for Backyard Storage | Should be uniformly hard, cool, clean, and free of condensation before being placed into a sealed container. |
| Seed for Planting | Must be dried carefully enough to remain viable and protected from excessive heat or mechanical cracking. |
| Unknown Moisture | Continue drying or use an appropriate grain-moisture test rather than guessing. |
🧪 Simple Backyard Dryness Checks
A calibrated moisture meter provides more dependable information than touch alone, but several simple checks can help identify peas that are clearly not ready for storage. These checks are screening tools rather than laboratory measurements.
Fingernail Test
A fully dried pea should resist light fingernail pressure. A pea that dents easily or feels rubbery still contains substantial moisture.
Cut-Seed Test
Cut several representative peas with a sturdy knife or seed cutter. Soft, flexible interiors indicate that additional drying is needed.
Jar Condensation Test
Place a small sample in a clean clear jar for several hours at a stable indoor temperature. Fogging or condensation indicates moisture movement and the need for further drying.
Sound Test
Dry peas produce a hard rattling sound when poured or shaken. Damp peas sound duller, although this test is subjective.
Weight Tracking
Weigh the same sample daily while it dries. When the weight remains stable under the same conditions, moisture loss has slowed substantially.
Moisture Meter
Use a meter calibrated or approved for peas whenever accurate storage moisture is important. Grain species settings are not automatically interchangeable.
🌧️ What to Do When Rain Threatens Before Harvest
A mature pea crop is vulnerable to repeated wetting. Rain can delay drying, encourage pod disease, stain seed, cause vines to lodge, and increase the chance that peas germinate inside split or damaged pods.
When most of the crop is physiologically mature but not fully dry, cutting the plants and curing them under cover may preserve more seed than leaving them through several days of wet weather. However, plants harvested too green may cure poorly and produce shriveled seed.
| Crop Status | Possible Response |
|---|---|
| Pods Still Green and Seeds Soft | Leave the crop to mature if practical. Cutting now risks immature, lightweight seed. |
| Most Pods Yellowing and Seeds Firm | Consider cutting and curing under cover when prolonged rain is likely. |
| Most Pods Dry With Some Green Upper Pods | Harvesting may prevent lower-pod shattering and weather damage. |
| Crop Wet From Recent Rain | Allow surface moisture to dry before bundling or moving vines into an enclosed area. |
| Pods Already Moldy or Decaying | Separate affected material rather than allowing it to contaminate sound plants. |
🌱 Saving Field Peas for Next Year’s Seed
Peas are predominantly self-pollinating, which makes them easier to save true-to-type than many cross-pollinated crops. Nevertheless, variety mixing, accidental harvesting, mechanical mixtures, disease, and occasional insect-assisted crossing can still affect seed purity.
Select seed from healthy, productive plants that match the expected variety. Avoid saving from plants that matured unusually late, showed severe disease, lodged badly, or produced shriveled and damaged seed.
- Begin with an open-pollinated variety when long-term seed saving is the goal.
- Label each variety clearly at planting.
- Keep different pea varieties separated and harvest them independently.
- Remove severely diseased or off-type plants before harvest.
- Allow chosen pods to mature fully and dry on the plant when weather permits.
- Dry harvested pods under cover before shelling.
- Retain the largest sound seeds from representative healthy plants.
- Reject cracked, shriveled, moldy, insect-damaged, or immature seed.
- Store planting seed separately from peas intended for feeding.
- Record the variety, year, location, and any crop problems.
🧬 Open-Pollinated Peas vs. Hybrid Seed
Most field pea varieties are developed as stable self-pollinating lines rather than conventional first-generation hybrids. Seed saved from a correctly identified open-pollinated field pea can generally reproduce plants similar to the parent variety when purity and health are maintained.
Seed from an unknown mixture may still grow, but plant height, maturity, flower color, seed color, lodging, and feeding characteristics may vary. This is one reason cover-crop blends and commodity peas are not ideal when the goal is maintaining a specific named variety.
📦 Keeping Harvest Lots Separate
Field peas harvested on different dates or from different garden areas may not have the same moisture, cleanliness, variety, or disease history. Keeping them separate until final drying and inspection reduces the chance that one poor lot damages the rest.
| Separate Lots When They Differ By | Reason |
|---|---|
| Variety | Preserves identity and prevents different seed colors, maturity patterns, and feeding characteristics from becoming mixed. |
| Harvest Date | Later harvests may contain wetter or less mature peas. |
| Garden Location | One bed may have experienced flooding, disease, chemical drift, or soil contamination. |
| Drying Method | Seed dried indoors may differ from seed exposed to additional field weathering. |
| Intended Use | Planting seed should receive stricter selection and gentler handling than peas intended only for prompt feed use. |
| Quality | Questionable peas should never be blended into a sound batch while their condition is being evaluated. |
📦 Long-Term Storage of Dry Field Peas
Proper storage is just as important as growing a successful crop. Even perfectly harvested peas can be ruined by excess moisture, insects, rodents, or poor storage conditions. The goal is to keep the peas cool, dry, clean, and protected until they are eventually fed, planted, or processed.
Unlike fresh green peas, mature dry field peas are capable of remaining viable for years when stored correctly. Their longevity depends on initial seed quality, moisture content, storage temperature, container type, and protection from pests.
Cool Temperatures
Cool storage slows respiration, insect development, mold growth, and natural seed aging. Large swings in temperature should be avoided whenever possible.
Low Moisture
Only thoroughly dried peas should be placed into long-term storage containers. Excess moisture is the leading cause of mold, heating, and spoilage.
Dark Storage
Store containers away from direct sunlight. Light raises temperatures and contributes to gradual deterioration of stored seed.
Clean Containers
Always begin with containers that are clean, dry, food-safe, and free of insects, chemical residue, oil, fuel, or previous contamination.
🪣 Choosing Storage Containers
The ideal storage container depends upon how quickly the peas will be used and how much seed is being stored. Backyard growers often have several different lots intended for feeding, planting, or future breeding projects.
| Container | Advantages | Limitations |
|---|---|---|
| Food-Grade Plastic Bucket | Durable, inexpensive, rodent resistant, stacks well. | Only use after peas are completely dry before sealing. |
| Glass Jar | Excellent for seed-saving and small quantities. | Breakable and should be protected from light. |
| Metal Container | Excellent rodent protection. | May develop condensation if temperature changes rapidly. |
| Heavy Mylar Bag | Excellent long-term storage when properly sealed. | Requires dry seed and careful handling to avoid punctures. |
| Paper Bag | Good for short-term drying. | Poor protection from insects, moisture, and rodents. |
| Cloth Bag | Allows airflow during curing. | Not recommended for long-term storage. |
🏷️ Label Everything
One of the most common mistakes made by home gardeners is storing seed without adequate labels. Months later it becomes impossible to remember the variety, harvest date, or intended purpose.
- Variety name
- Harvest year
- Harvest location
- Intended use (feed or planting)
- Source of the original seed
- Any disease observations
- Approximate germination (if tested)
- Date container was sealed
🐭 Preventing Rodent Damage
Mice, rats, squirrels, chipmunks, and other rodents can destroy a year's worth of harvested peas surprisingly quickly. Besides eating the crop, rodents contaminate stored food with urine, droppings, nesting material, and disease organisms.
Elevate Containers
Store buckets and containers off concrete floors using shelves or pallets.
Inspect Frequently
Look for chew marks, droppings, nesting material, or damaged lids.
Keep Storage Areas Clean
Remove spilled grain immediately so rodents are not attracted to the area.
Seal Entry Points
Repair openings around doors, vents, pipes, and foundations before rodents discover the stored crop.
🐞 Preventing Insect Damage During Storage
Stored legumes occasionally become infested by insects such as pea weevils or bean weevils if eggs or larvae were present before storage. Warm storage temperatures greatly accelerate insect development.
| Prevention Method | Benefit |
|---|---|
| Inspect seed before storage | Removes damaged peas before insects spread. |
| Keep storage cool | Slows insect reproduction. |
| Use sealed containers | Reduces reinfestation. |
| Inspect every month | Allows early detection before major damage occurs. |
| Rotate older peas first | Reduces lengthy storage periods. |
🔎 Monthly Storage Inspection
Stored peas should be inspected regularly throughout the year. Waiting until feeding time may allow a small problem to become a complete loss.
- Look for condensation inside containers.
- Check for mold or musty odors.
- Inspect for insect activity.
- Look for rodent damage.
- Verify labels remain readable.
- Check for cracked lids or damaged containers.
- Ensure peas remain cool and dry.
🌱 Sprouting Field Peas for Chickens
Some chicken keepers sprout field peas before feeding them. Sprouting changes the seed from a dormant grain into a living plant and may improve palatability while providing fresh green forage during seasons when pasture is unavailable.
Although sprouting changes the nutritional profile of the seed, it does not transform field peas into a complete poultry ration. Sprouted peas remain a supplemental feed.
1. Select Clean Seed
Only use untreated peas intended for food or feed.
2. Rinse Thoroughly
Wash away dust and debris before soaking.
3. Soak
Soak according to accepted sprouting practices using clean potable water.
4. Drain Well
Standing water encourages bacterial growth and mold.
5. Rinse Daily
Continue rinsing and draining until sprouts develop.
6. Feed Promptly
Offer sprouts while fresh and discard any that become slimy, moldy, or foul smelling.
🔨 Processing Field Peas Before Feeding
Field peas may be offered to chickens in several different forms depending upon bird age, flock size, equipment available, and the role peas play in the overall diet.
| Processing Method | Advantages | Considerations |
|---|---|---|
| Whole Dry Peas | Simple storage with minimal processing. | Large peas may be difficult for young chicks. |
| Cracked Peas | Improves access for smaller birds. | Reduced storage life compared to whole peas. |
| Ground Meal | Mixes easily into homemade rations. | Should be used relatively quickly after grinding. |
| Sprouted Peas | Provides enrichment and fresh vegetation. | Requires careful sanitation. |
| Cooked Peas | Occasionally used in household leftovers. | Do not add excessive salt, oils, or seasonings. |
| Fresh Green Peas | Excellent seasonal enrichment. | Spoil rapidly in warm weather. |
🐔 Feeding Field Peas to Chickens
Field peas should be viewed as one ingredient within a balanced feeding program rather than a replacement for complete commercial feed. Their value lies in supplying homegrown protein, dietary variety, enrichment, and seasonal diversity.
Adult chickens generally consume whole peas readily after becoming familiar with them. Young birds may benefit from cracked or coarsely ground peas until they are able to consume larger seed comfortably.
⚖️ Approximately How Much Should Field Peas Contribute?
There is no single percentage appropriate for every backyard flock because nutritional needs vary according to age, breed, production level, environmental temperature, and the remainder of the diet. Commercial poultry nutritionists formulate complete rations using laboratory nutrient analyses rather than fixed ingredient percentages.
For most backyard flocks, field peas are best viewed as a supplemental homegrown ingredient rather than the foundation of the diet.
🚫 Feeding Mistakes to Avoid
- Do not feed chemically treated planting seed.
- Do not feed moldy or musty peas.
- Do not feed peas contaminated by rodents.
- Do not replace a balanced commercial ration entirely with peas.
- Do not leave wet peas in feeders for extended periods.
- Do not assume higher protein means complete nutrition.
- Do not ignore spoiled or fermented feed.
- Do not introduce large quantities all at once.
🦠 Common Diseases of Field Peas
Many diseases affecting field peas become more severe during cool, wet weather or where peas are grown repeatedly in the same location. Proper crop rotation, clean seed, resistant varieties, and good airflow remain the best preventive measures.
| Disease | Typical Symptoms |
|---|---|
| Ascochyta Blight Complex | Leaf spots, stem lesions, pod spotting. |
| Powdery Mildew | White powder-like growth on leaves. |
| Root Rot Complex | Poor vigor, brown roots, stunting. |
| Fusarium Wilt | Yellowing and vascular discoloration. |
| Downy Mildew | Yellow patches with gray fungal growth beneath leaves. |
🐛 Common Insect Pests
Several insects may feed upon field peas depending upon geographic location and local growing conditions. Regular scouting allows problems to be identified before significant crop losses occur.
| Pest | Damage |
|---|---|
| Pea Aphids | Sap feeding, curled growth, possible virus transmission. |
| Pea Weevil | Larvae develop within seeds. |
| Cutworms | Sever seedlings near soil level. |
| Leafhoppers | Sap feeding and possible disease transmission. |
| Thrips | Feeding injury to flowers and foliage. |
❓ Frequently Asked Questions
Can chickens eat field peas?
Yes. Chickens can eat clean, properly harvested field peas as part of a balanced feeding program. Depending on the birds’ age and the size of the peas, they may be offered whole, cracked, coarsely ground, cooked, or sprouted. Field peas should supplement an appropriately formulated poultry ration rather than completely replace it.
Are field peas the same as garden peas?
Field peas and common garden peas belong to the same species, Pisum sativum, but they are usually selected for different purposes. Garden peas are commonly bred for tenderness and sweetness when harvested green. Field peas are more often grown for mature dry seed, livestock feed, cover cropping, or soil improvement.
Are field peas the same as cowpeas?
No. Field peas are Pisum sativum, while cowpeas are Vigna unguiculata. Field peas generally perform best in cool conditions, while cowpeas are warm-season plants that tolerate summer heat more effectively. The two crops also differ in growth habit, planting season, seed characteristics, and inoculant requirements.
Can chickens eat whole dry field peas?
Many adult chickens can consume whole dry peas, particularly when the peas are offered gradually and the birds have access to appropriate grit. Young chicks and smaller birds may handle cracked or coarsely ground peas more easily. Whole peas should always be clean, fully mature, properly dried, and free from mold or chemical treatment.
Do field peas need to be cooked before chickens eat them?
Field peas are commonly used as a poultry-feed ingredient without household-style cooking. However, the appropriate processing method depends on the formulation, pea variety, bird age, and amount being included. Backyard keepers should not assume that uncooked peas alone provide a complete diet. Cooked household peas may be offered occasionally when they are plain and free from excessive salt, fat, sauces, or seasoning.
Can chickens eat pea pods and vines?
Chickens may peck at tender green leaves, shoots, flowers, and pods when given access to field pea plants. Mature vines and dry pods become fibrous and are less useful as feed. Allowing chickens into the planting too early can destroy seedlings, reduce flowering, and eliminate much of the pea harvest.
Can chickens eat field pea leaves?
Young clean field pea foliage may be consumed as seasonal forage, but leaves and vines should be considered enrichment rather than a concentrated feed source. Plants exposed to chemicals, mold, or contamination should never be offered to chickens.
Can field peas replace commercial chicken feed?
No. Field peas provide useful protein and energy, but they do not supply every nutrient in the proportions required by laying hens, growing chicks, or meat birds. A complete poultry ration also balances amino acids, vitamins, minerals, calcium, phosphorus, energy, and other nutrients. Field peas should be incorporated carefully rather than used as the flock’s only feed.
How many field peas should I feed my chickens?
There is no universal amount suitable for every flock. The appropriate inclusion depends on bird age, production stage, pea quality, nutrient analysis, processing method, and the remainder of the ration. Small amounts may be used as enrichment, while larger dietary inclusion should be based on a properly formulated poultry ration.
Do field peas need inoculant?
Field peas can grow without inoculant, but effective inoculation helps the plants form nitrogen-fixing root nodules when the correct bacteria are not already abundant in the soil. Use a fresh inoculant labeled for peas, lentils, or the appropriate Rhizobium group, and follow the product’s storage and application directions.
Should nitrogen fertilizer be applied to field peas?
Field peas generally require little or no nitrogen fertilizer when they are effectively nodulated. Excess nitrogen can encourage leafy growth, reduce biological nitrogen fixation, delay maturity, and increase lodging. Soil testing is the best guide for phosphorus, potassium, sulfur, pH correction, and other fertility needs.
Can field peas be grown as a winter crop?
Winter field pea varieties, including Austrian winter peas, may be planted in fall where local winters are suitable. Their survival depends on variety, planting date, snow cover, drainage, soil conditions, and minimum temperatures. In colder regions, spring-planted field peas are generally more dependable.
Can field peas tolerate frost?
Young field pea plants tolerate cool weather and light frost better than many warm-season crops. Severe freezes can still damage seedlings, flowers, pods, or winter plantings. Flowers and developing pods are generally more vulnerable than established vegetative growth.
Why are my field pea plants turning yellow?
Yellowing may result from poor nodulation, waterlogged soil, drought, nutrient deficiency, root disease, soil compaction, natural maturity, or herbicide injury. Dig up several plants carefully and inspect the roots. Effective nodules are commonly pink or reddish inside when cut open. Brown, rotted, or poorly developed roots may indicate drainage or disease problems.
Why are my field peas producing vines but few pods?
Excess nitrogen, excessive shade, heat during flowering, inadequate moisture, severe drought, flower injury, or planting a variety poorly suited to the local season can reduce pod production. Dense planting and vigorous companion crops may also increase competition and lodging.
Why are my field peas falling over?
Field peas naturally have relatively weak stems and may lodge as vines become taller and pods become heavier. Excess nitrogen, dense stands, wind, rain, disease, and overly lush growth can make lodging worse. A companion small grain may provide additional support, although it also competes for moisture, light, and nutrients.
How do I know when dry field peas are ready to harvest?
Dry peas are nearing harvest when most leaves have yellowed or fallen, pods are tan or brown, and the peas are hard and fully colored. Do not wait until every pod becomes brittle because the earliest pods may split and scatter their seed. Harvested vines can finish drying under cover before threshing.
How long can dried field peas be stored?
Storage life depends on moisture, temperature, cleanliness, container quality, and insect protection. Thoroughly dried peas kept cool in sealed food-safe containers may remain useful for an extended period, but every batch should be inspected regularly. Planting seed should also be germination tested before it is relied upon for a future crop.
Can I plant dried peas sold for food or animal feed?
Some may germinate, but the variety, age, treatment history, germination rate, and disease status may be unknown. Certified or clearly labeled seed provides more dependable establishment and variety information. Never plant or feed seed treated with a chemical seed coating for a purpose not allowed by its label.
Can I save seed from my own field peas?
Yes. Field peas are predominantly self-pollinating, making them practical for backyard seed saving. Choose healthy, true-to-type plants and allow their pods to mature fully. Dry, clean, label, and store planting seed separately. Avoid saving seed from plants affected by serious seedborne disease.
Are moldy field peas safe for chickens?
No. Do not feed peas that are moldy, musty, heated, fermented, rodent contaminated, or otherwise spoiled. Removing the visibly damaged peas does not guarantee that the remainder is safe because moisture and fungal growth may extend beyond the obvious area.
Are field peas better than corn for chickens?
Field peas and corn provide different nutritional benefits. Corn is primarily an energy source, while field peas contribute additional protein and nutritional diversity. A balanced feeding program can use multiple crops together rather than relying on a single feed ingredient.
✅ Final Field Pea Growing Checklist
- Choose a field pea variety suited to your planting season and climate.
- Purchase clean seed with a known variety and treatment status.
- Never feed seed coated with chemical seed treatment.
- Plant in full sun and well-drained soil.
- Use soil testing to guide lime and fertilizer decisions.
- Apply the correct fresh legume inoculant when needed.
- Avoid unnecessary nitrogen fertilizer.
- Plant at a consistent depth into a firm, moist seedbed.
- Protect emerging plants from chickens and wildlife.
- Control weeds before they overtake the young crop.
- Provide water during flowering and pod filling when rainfall is inadequate.
- Scout regularly for aphids, weevils, root disease, and leaf symptoms.
- Harvest green peas promptly or allow seed peas to mature fully.
- Move mature vines under cover before excessive shattering or wet weather causes losses.
- Thresh, clean, and sort peas before storage.
- Dry peas thoroughly before placing them in sealed containers.
- Label every stored lot with its variety, year, location, and intended use.
- Inspect stored peas regularly for moisture, mold, insects, and rodents.
- Introduce field peas gradually while maintaining a balanced poultry ration.
🌿 Are Field Peas a Good Crop for Backyard Chickens?
Field peas can be a valuable cool-season crop for chicken keepers who want to grow a portion of their own supplemental feed. They produce protein-rich seed, contribute crop diversity, support soil-building rotations, and can provide green forage and seasonal enrichment.
Their greatest advantages appear where cool growing weather, suitable soil, and dependable spring or fall moisture allow the plants to flower and fill pods before severe heat arrives. They are less dependable in poorly drained ground, extreme summer heat, or gardens where chickens cannot be excluded during establishment.
Field peas should not be treated as a complete replacement for formulated poultry feed. Their best role is as one carefully managed ingredient within a diverse system that may also include grains, forage crops, oilseeds, garden produce, insects, and a nutritionally complete base ration.
Our Recommendation
Consider field peas when you need a cool-season legume that can produce edible dry seed while supporting crop rotation and biological nitrogen fixation. Start with a manageable planting, keep accurate records, and evaluate how well the variety performs in your soil and climate before expanding production.
📚 Research Sources
The recommendations in this guide were developed from land-grant university, government, and sustainable-agriculture resources. Growing conditions vary, so local Cooperative Extension guidance should be used when selecting varieties, planting dates, pest controls, and fertility programs.
- North Dakota State University Extension — Field Pea Production
- University of Minnesota Extension — Growing Peas in Home Gardens
- University of Minnesota Extension — Saving Vegetable Seeds
- Penn State Extension — Forage and Field Peas
- Sustainable Agriculture Research and Education — Field Peas
- USDA Agricultural Research Service
- USDA PLANTS Database
- Michigan State University Extension — Dry Peas as a Livestock Feed Ingredient
- Manitoba Agriculture — Field Pea Production Information
🔗 Continue Exploring Chicken Feed Crops
Field peas are only one possible component of a homegrown chicken-feed system. Compare them with warm-season legumes, grains, leafy forage crops, perennial biomass plants, and seed-producing crops before deciding how to use your available growing space.